> ## Documentation Index
> Fetch the complete documentation index at: https://mainwp-mintlify-b66ccbcf.mintlify.site/llms.txt
> Use this file to discover all available pages before exploring further.
# Staging
> Create and manage staging sites for your Child Sites directly from your MainWP Dashboard using WP Staging. Test updates safely on staging replicas before applying changes to production sites.
## What You'll Learn
* Installing the Staging extension and WP Staging plugin
* Creating staging sites from child sites
* Updating and deleting staging sites
* Running updates on staging sites first
***
**Integration Add-on** - This add-on requires the WP Staging plugin on Child Sites.
**Staging Sites** are sites that duplicate your **Production Sites** *(same hardware, same software, same settings)* so that any change can be tested and evaluated before being placed into production.
In other words, it's a complete but independent copy of your production site, including the database.
The MainWP Staging Extension allows you to create and manage staging sites without hassle.
The MainWP Staging Extension requires the [WP Staging](https://wordpress.org/plugins/wp-staging/) or WP Staging Pro plugin on your Child Sites.
## How it works
Once you trigger the process of creating a staging site, the WP Staging plugin will duplicate all site files and copy them to a subdirectory.
All database tables will be duplicated, but the prefix will be changed.
Once this process is done, the necessary data will be updated in the **wp-config.php** file in the staging site.
Within a couple of seconds, you will have a replica of your child site where you can test updates.
After creating a staging site, MainWP adds the new staging URL to your MainWP Dashboard as a staging site and places it in the **Staging Sites** tag when that tag exists.
MainWP Staging Extension is extensively tested by the MainWP team. If you find any issues, please contact [MainWP Support](https://mainwp.com/mainwp-support/).
## Install and Set the MainWP Staging Extension
Installation of the MainWP Staging Extension requires two important steps:
* Installing the Extension itself on your MainWP Dashboard site
* Installing the [WP Staging](https://wordpress.org/plugins/wp-staging/) plugin on Child Sites
### Installing the Extension
The MainWP Staging Extension needs to be installed only on your MainWP Dashboard site. You can [install it as any other MainWP Extension.](/dashboard/overview/manage-extensions#install-extensions)
### Installing the Plugin
For the proper use of the MainWP Staging Extension, you need to install and activate the WP Staging plugin on your child sites. The extension also detects WP Staging Pro when it is installed and active.
### Install from MainWP Dashboard
[Select your child](/getting-started/mainwp-user-interface) sites
In the **Installation Options** box, make sure that the **Activate after installation option** is selected.
For additional help with installing WordPress plugins from the MainWP Dashboard, please review this [help document](/sites/plugins/managing-plugins-with-mainwp).
### Install directly on Child Site
For additional help with installing WordPress plugins, please review this [help document.](https://wordpress.org/documentation/article/manage-plugins/) After installing the WP Staging plugin, it is required to Synchronize your sites so your MainWP Dashboard becomes aware that the plugin has been installed and activated.
## Create Staging Site
To create a staging site for a child site,
In the list of child sites, locate the wanted child site and click the **Create Staging Site** action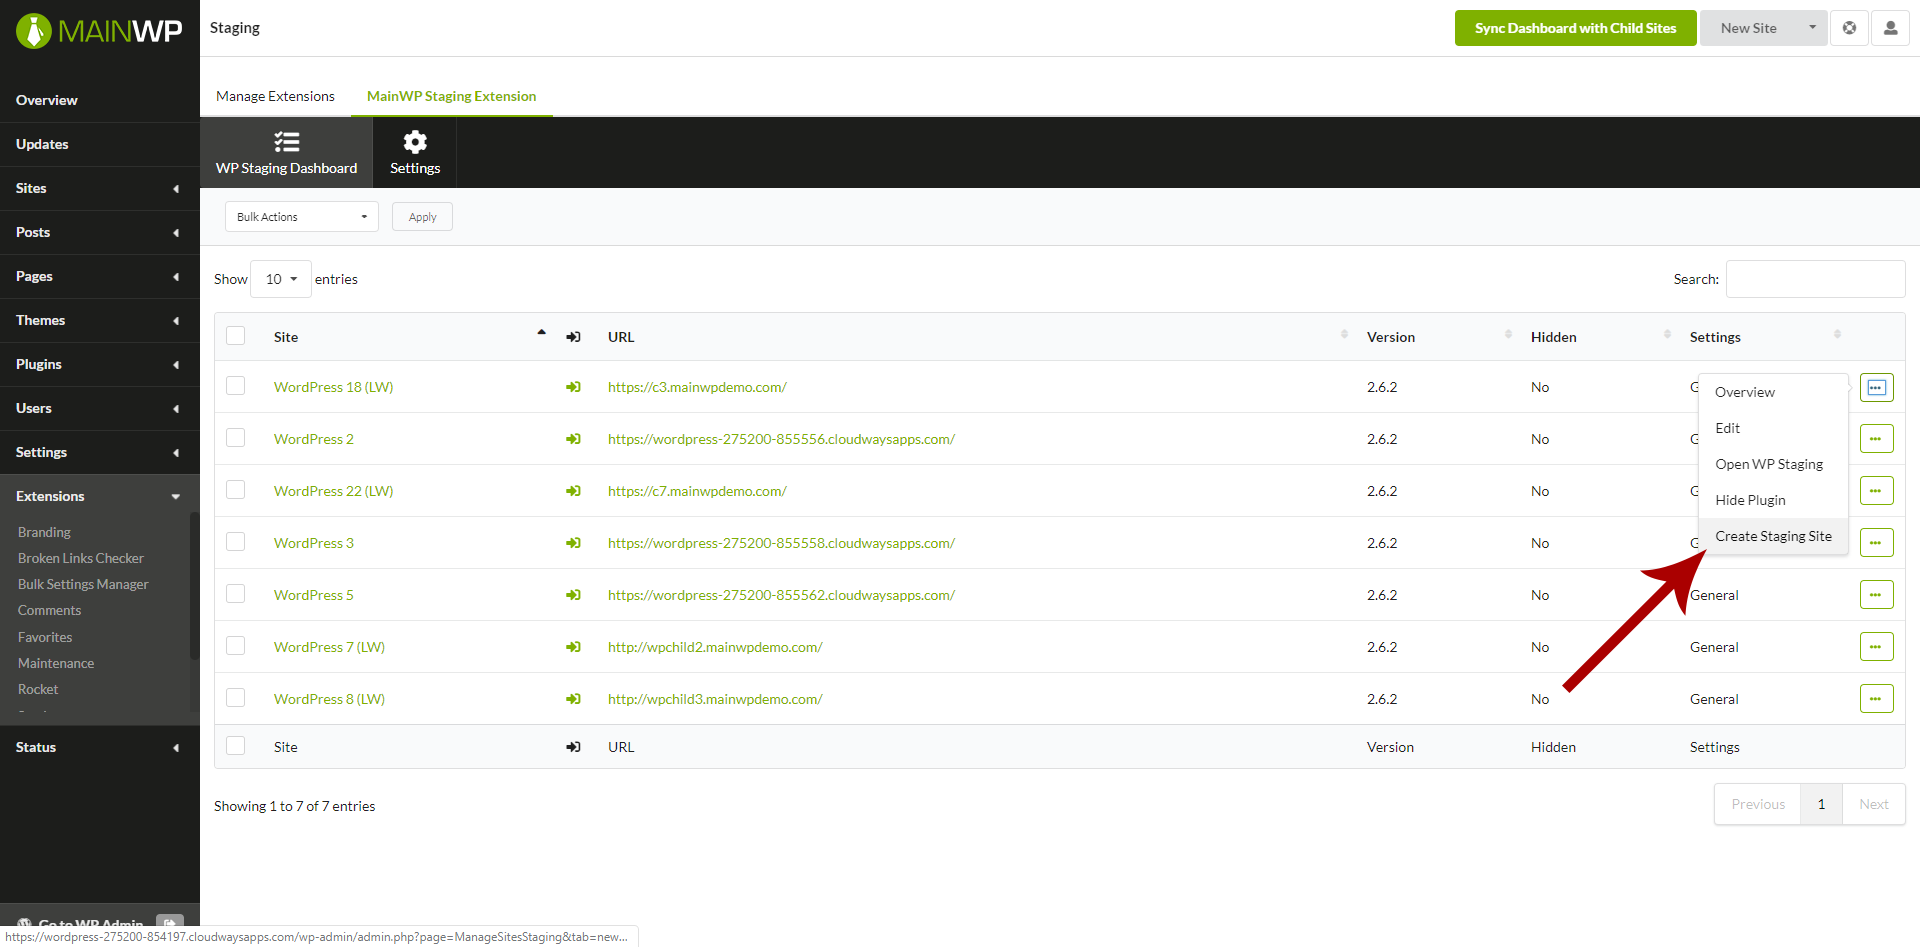 Enter the **Staging Site Name**
1. Exclude/Include database tables
2. Exclude/Include files
3. Click the **Create Staging Site** button
Enter the **Staging Site Name**
1. Exclude/Include database tables
2. Exclude/Include files
3. Click the **Create Staging Site** button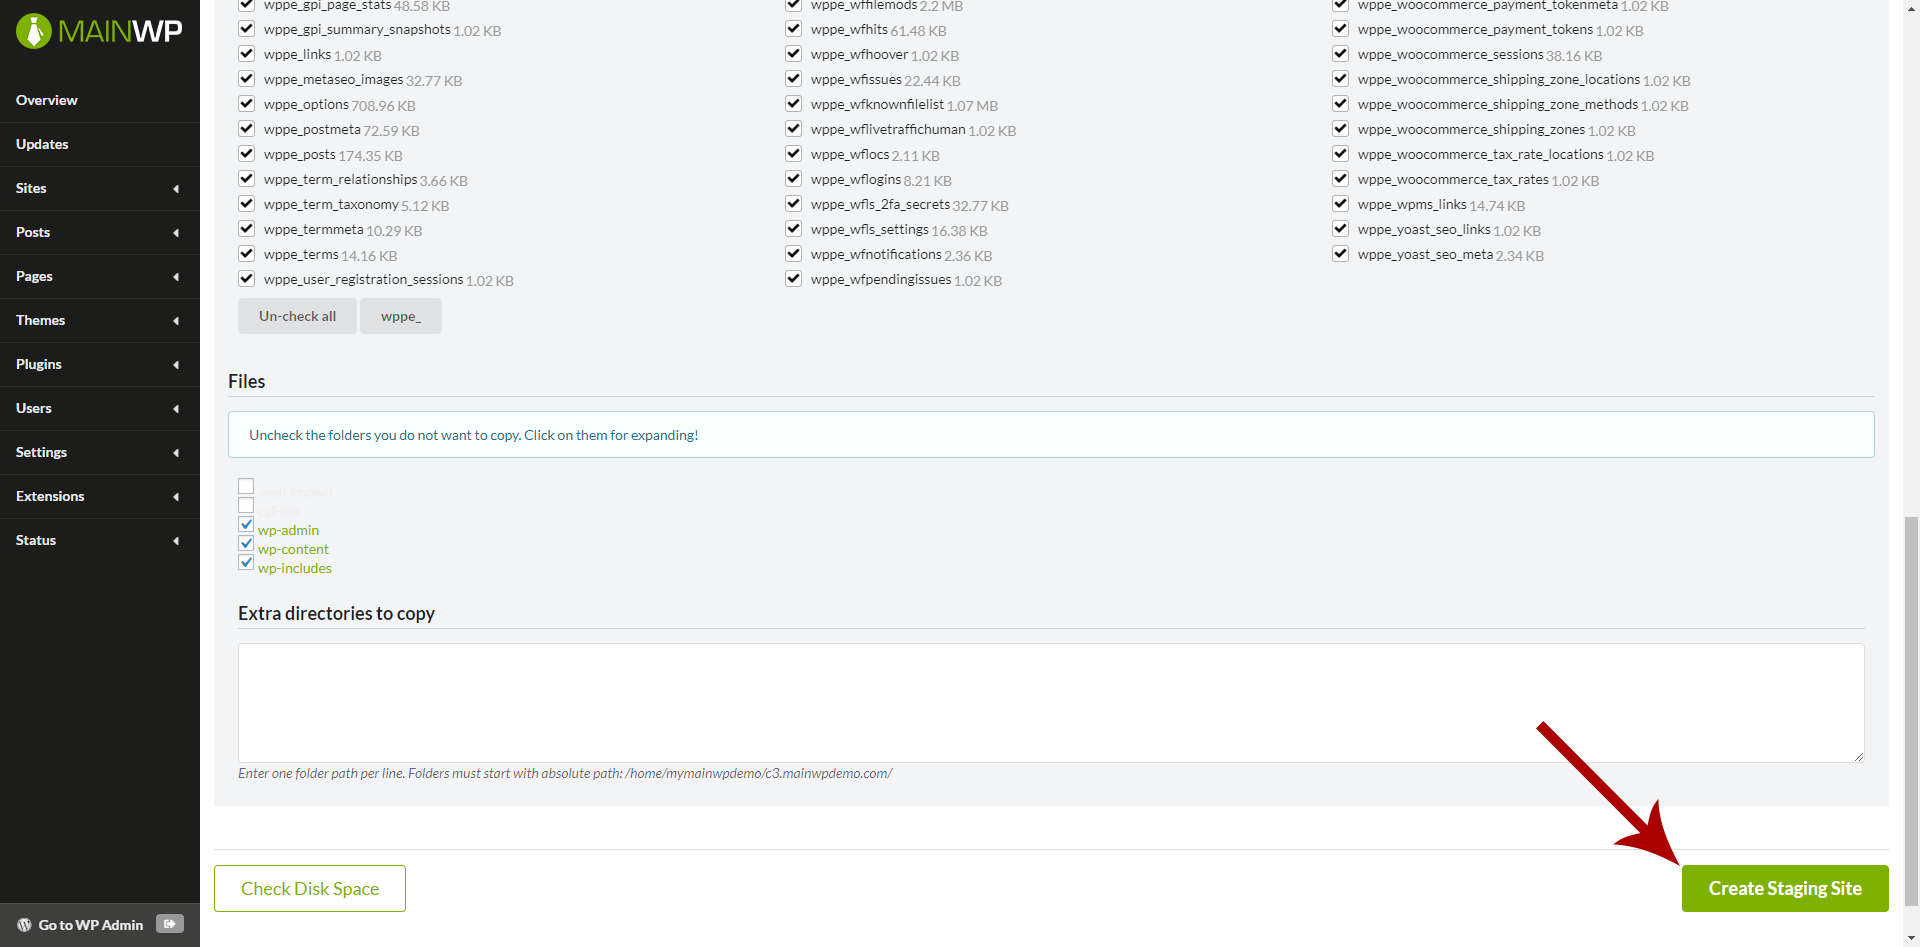 ## Update a Staging Site
Updating a staging site will copy the database and files from the live site to the staging site again. To do that,
Click the **Manage Staging Sites** action (you will be redirected to the page where you can see your staging sites for the child site)
## Delete a Staging Site
To delete a staging site,
Click the **Manage Staging Sites** action (you will be redirected to the page where you can see your staging sites for the child site)
## Run Updates on Staging Sites
To run updates on your child sites,
## Update a Staging Site
Updating a staging site will copy the database and files from the live site to the staging site again. To do that,
Click the **Manage Staging Sites** action (you will be redirected to the page where you can see your staging sites for the child site)
## Delete a Staging Site
To delete a staging site,
Click the **Manage Staging Sites** action (you will be redirected to the page where you can see your staging sites for the child site)
## Run Updates on Staging Sites
To run updates on your child sites,
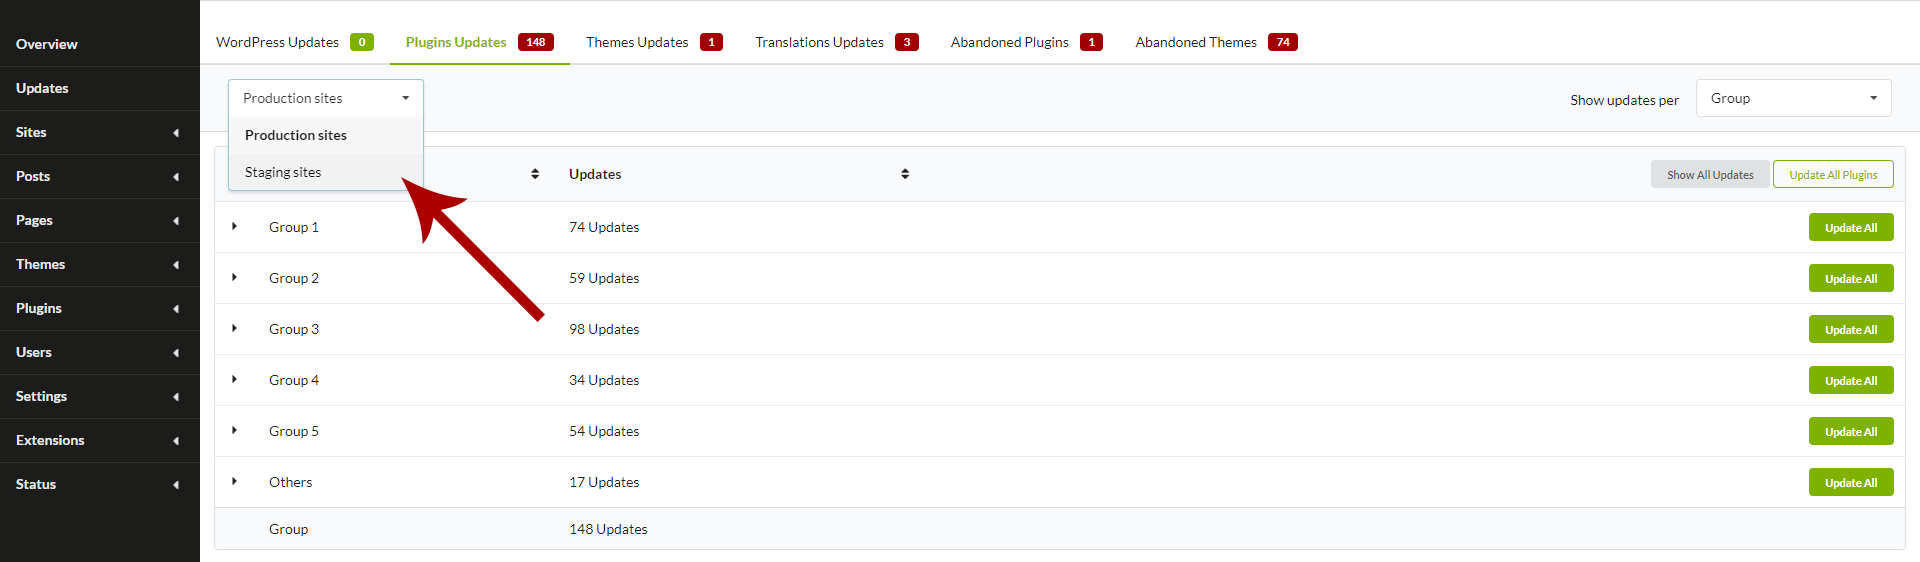 After selecting **Staging sites**, updates will be performed only on staging sites. After you verify that everything is ok on the staging sites, you can run updates on your production sites.
***
## Related Resources
* [Development Add-ons](/add-ons/development) - Browse all development tools
* [Clone Extension](/add-ons/development/clone-extension) - Clone sites between servers
* [Manage Updates](/sites/updates/manage-updates) - Understanding update management
After selecting **Staging sites**, updates will be performed only on staging sites. After you verify that everything is ok on the staging sites, you can run updates on your production sites.
***
## Related Resources
* [Development Add-ons](/add-ons/development) - Browse all development tools
* [Clone Extension](/add-ons/development/clone-extension) - Clone sites between servers
* [Manage Updates](/sites/updates/manage-updates) - Understanding update management