
What You’ll Learn
- Configuring automated and manual HTML scans
- Setting up post-update regression scans
- Viewing raw HTML and rendered differences
- Using change thresholds for notifications
Extension Add-on - This add-on provides standalone functionality within MainWP Dashboard. No third-party plugins required.
The Regression Testing extension for MainWP helps you monitor changes in your child sites’ source code. Any modification to a site’s HTML, whether from a plugin update, theme change, or a manual edit can introduce unexpected issues. This extension allows you to detect these differences early by comparing the most recent scan with the previous one.
You can configure scans to run on a fixed schedule (daily, weekly, twice per month, or monthly) or automatically trigger them after an update to plugins, themes, or WordPress core. Once a scan is complete, the system evaluates the differences, and if the percentage change exceeds a defined threshold, an email notification can be sent to alert you.
Regression Testing Dashboard
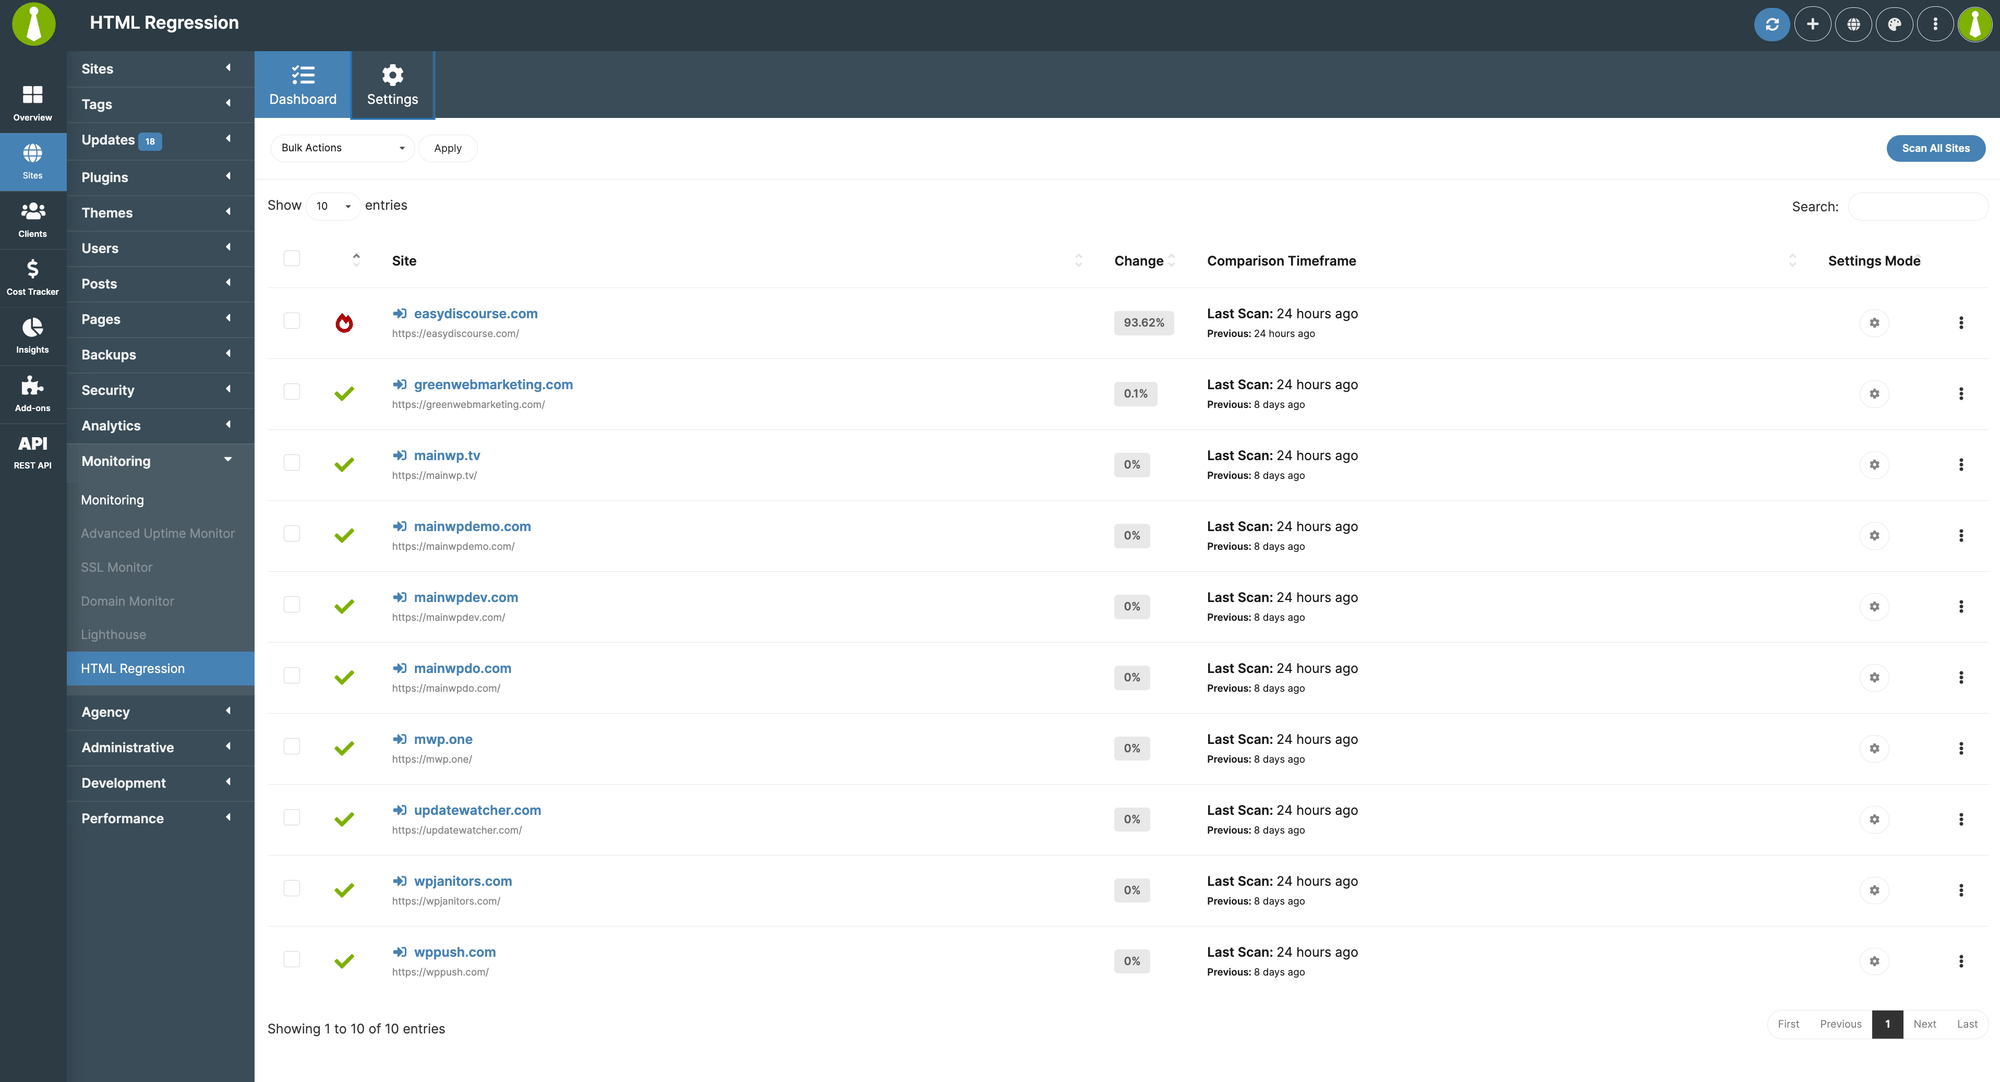
To open the add-on, go to MainWP > Add-ons > Monitoring > Regression Testing. The Dashboard page provides an overview of all connected child sites and their scan results. The sites table loads data on demand, so it stays responsive even with a large network. Use the search box to filter by site name or URL, click any column header to sort, and use the pager controls to move between pages. The default page length can be adjusted from the per-page selector at the top of the table. Each site in the list includes: • Site Name & URL – Click the site name to open its MainWP child site Dashboard. • Change Percentage – Displays how much the site’s HTML has changed since the last scan, giving you an immediate sense of whether an update introduced modifications. • Comparison Timeframe – Shows when the last two scans occurred. • Settings Mode – Lets you know if the site is using global settings or has custom, per-site configurations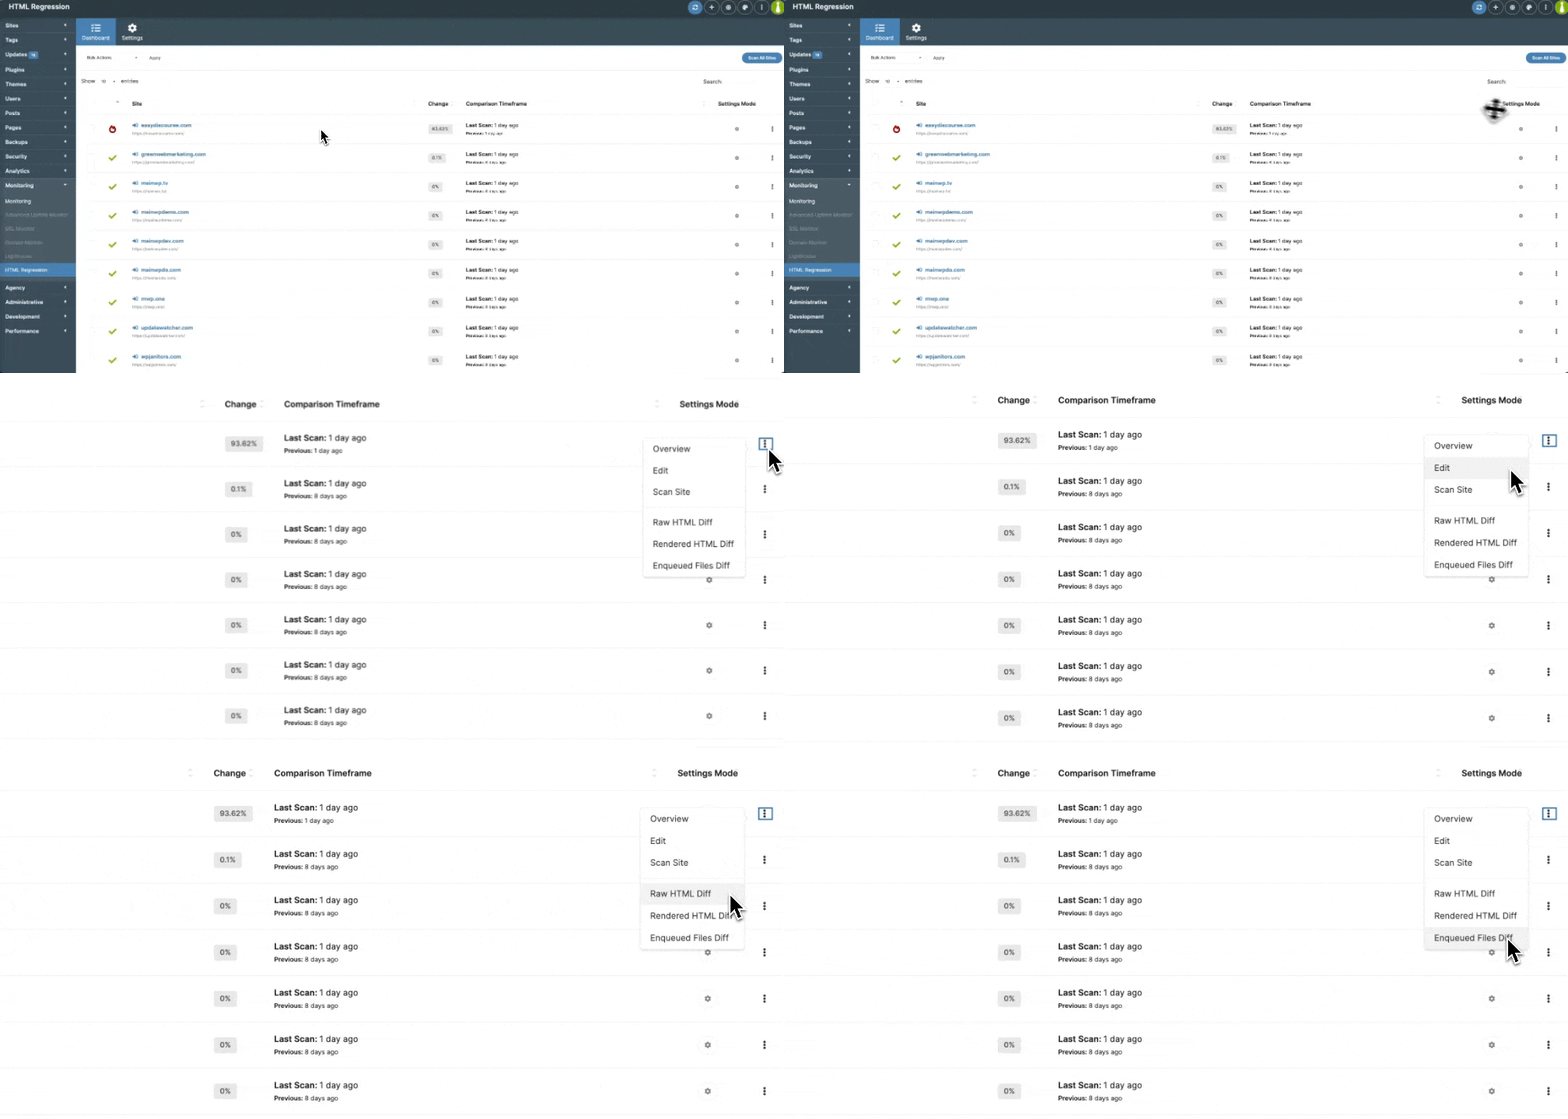
General Settings
To customize how scans are performed, navigate to MainWP > Add-ons > Monitoring > Regression Testing > Settings.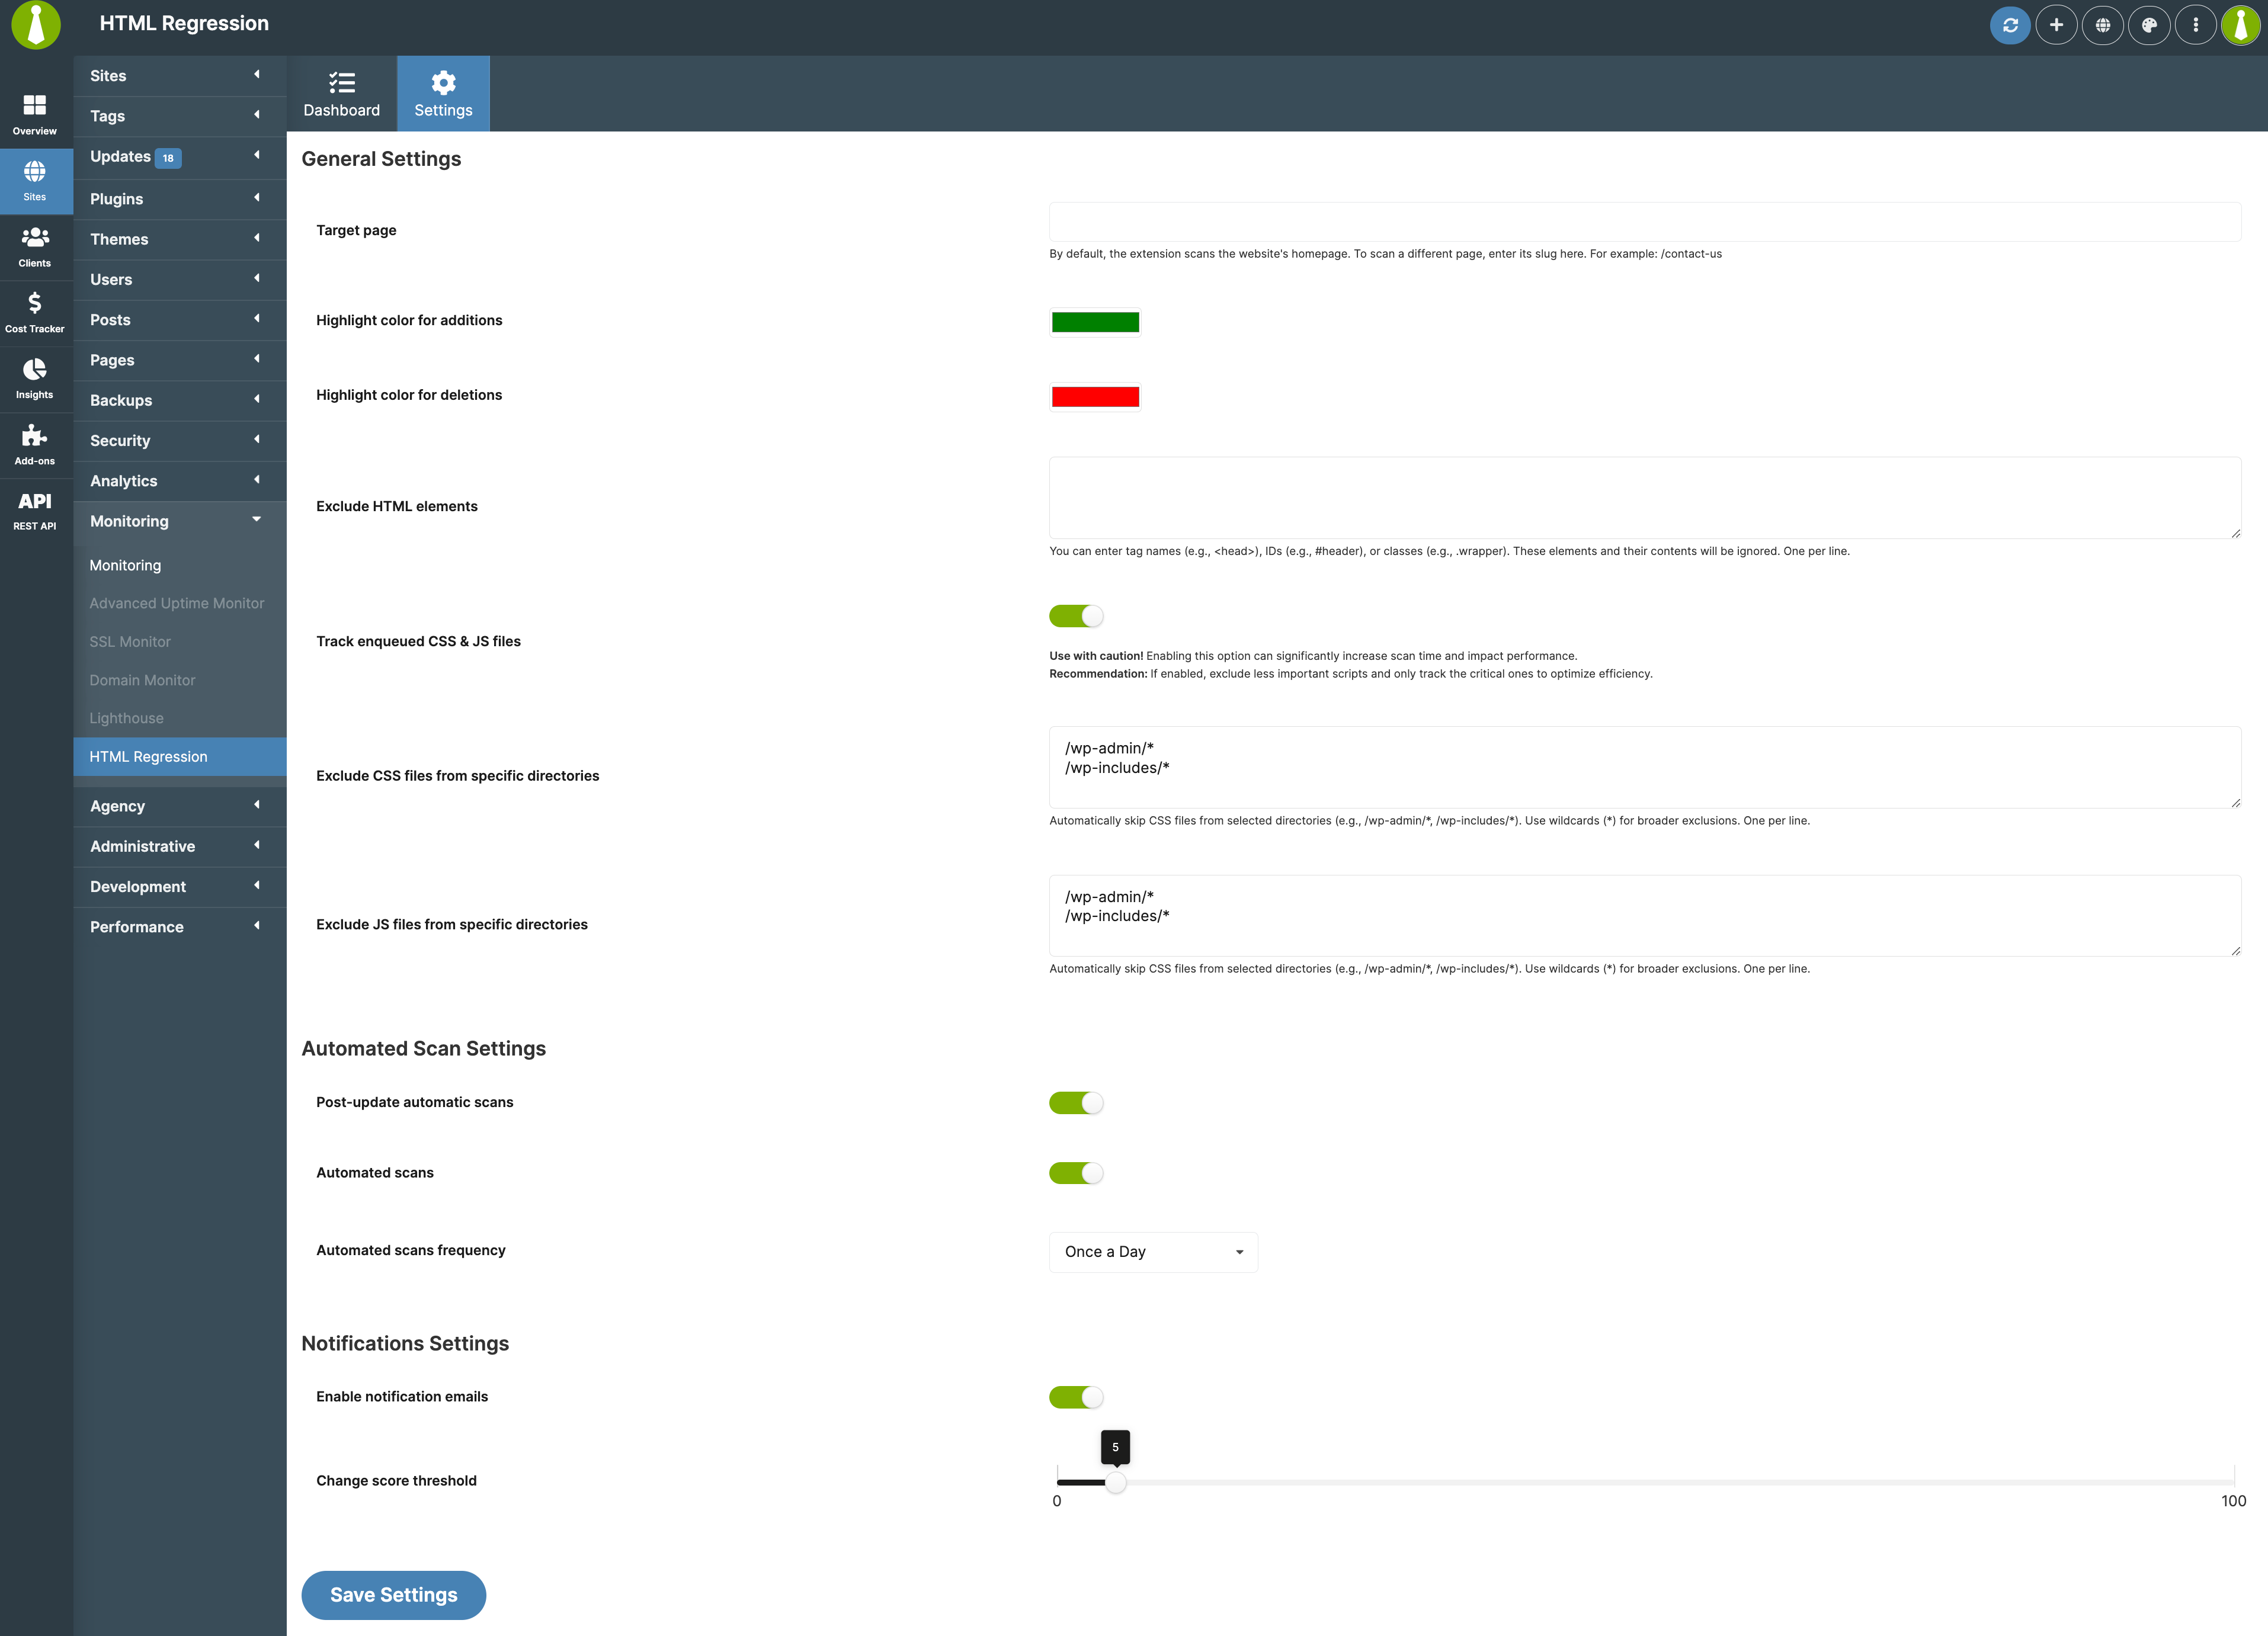
/ slug. If you want to scan another page, enter its slug, such as /contact-us. This is useful if a particular page, such as a pricing or checkout page, is more critical to monitor.
• Highlight color for additions and Highlight color for deletions – Set custom colors to highlight added and removed content in difference views.
• Exclude HTML elements – Specify elements to ignore, such as head, #header, or .wrapper.
• Track enqueued CSS & JS files – If enabled, the add-on will also track changes to JavaScript and CSS files. However, this can significantly increase scan time.
• Exclude CSS files from specific directories and Exclude JS files from specific directories – Prevent selected CSS or JS files from being included in the scan by specifying directories, such as /wp-admin/*.
• Snapshot retention policy - Set how long HTML snapshots should be kept before they are automatically deleted. Choose from 1 day, 1 week, 2 weeks, 1 month, 2 months, 3 months, 6 months, 1 year, or unlimited. Default is 30 days. The Child Site Overview widget uses this retention window for its Change chart history.
Automated Scan Settings
• Post-update automatic scans – Automatically perform a scan after a plugin, theme, or WordPress core update. After updates are finished on a Child Site, Regression Testing will begin automatically. The UI reflects this sequence, with status messages and icons that accurately indicate when an update or a regression scan is underway.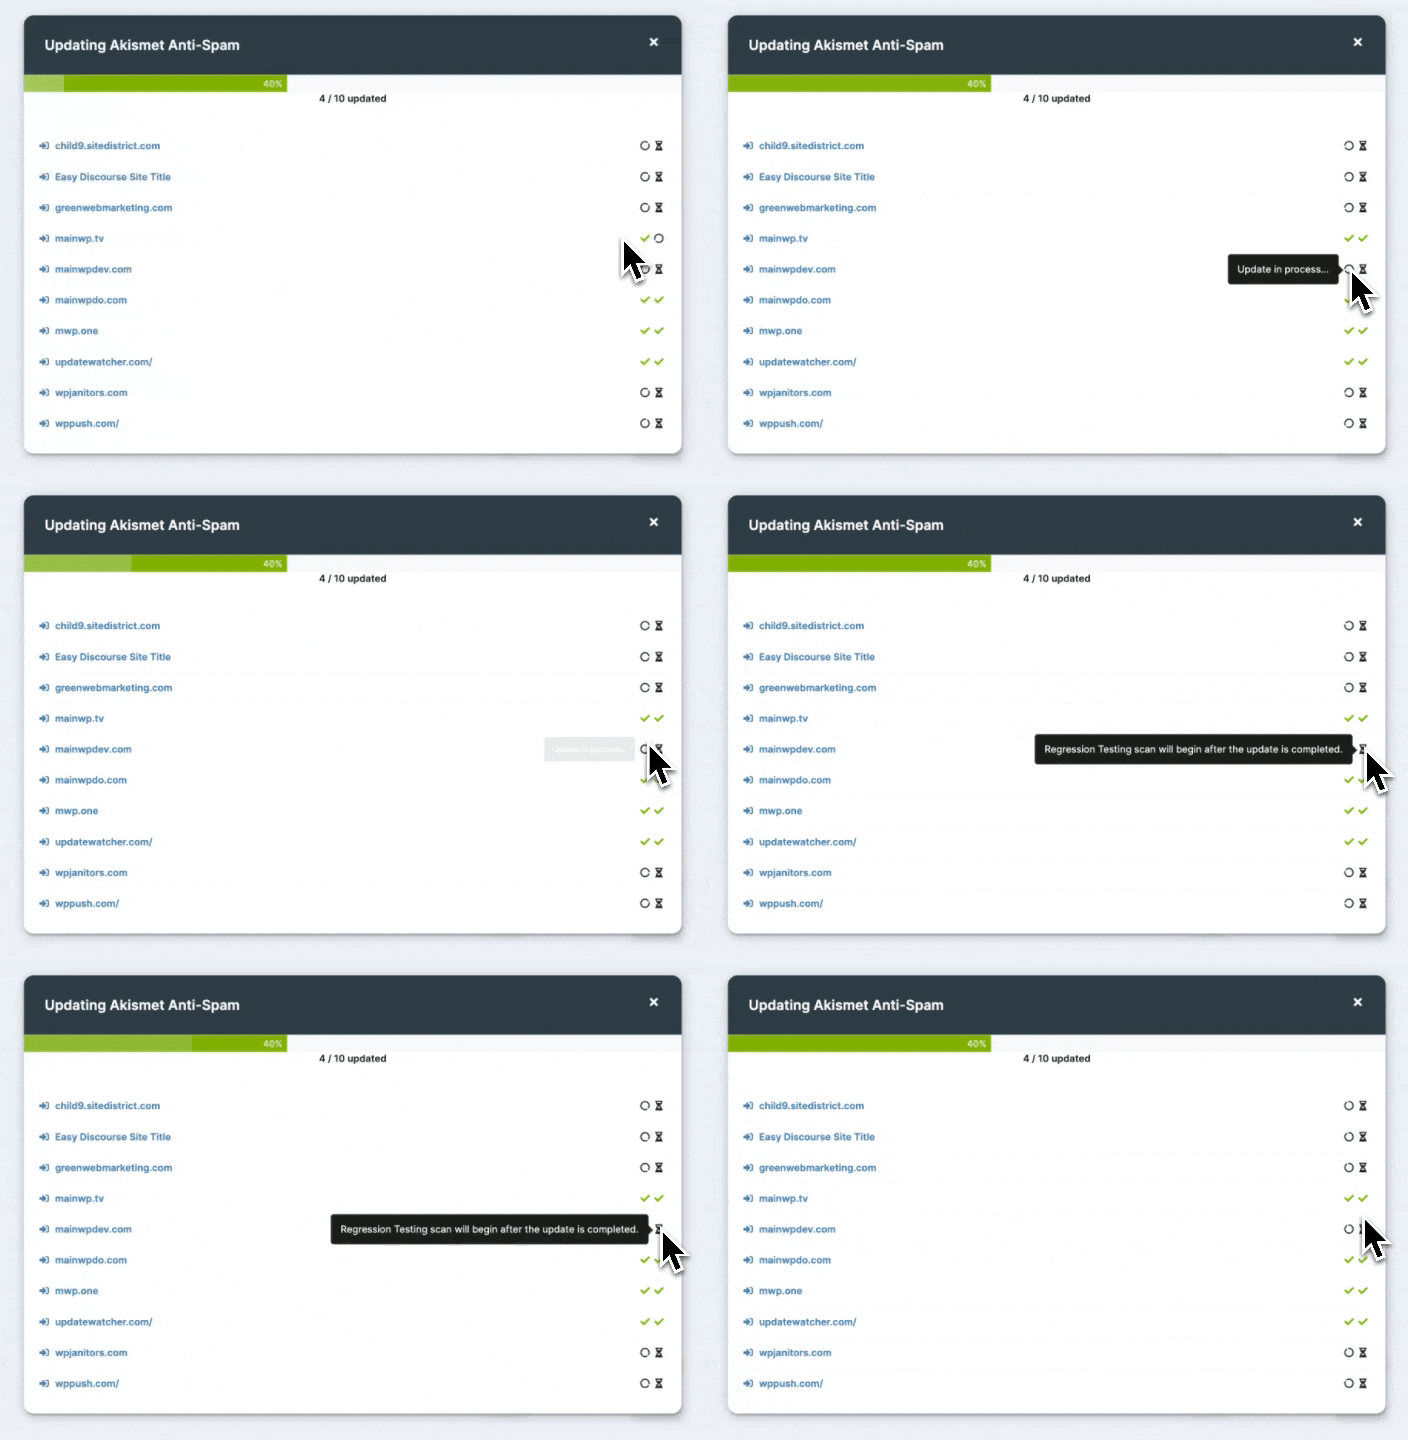
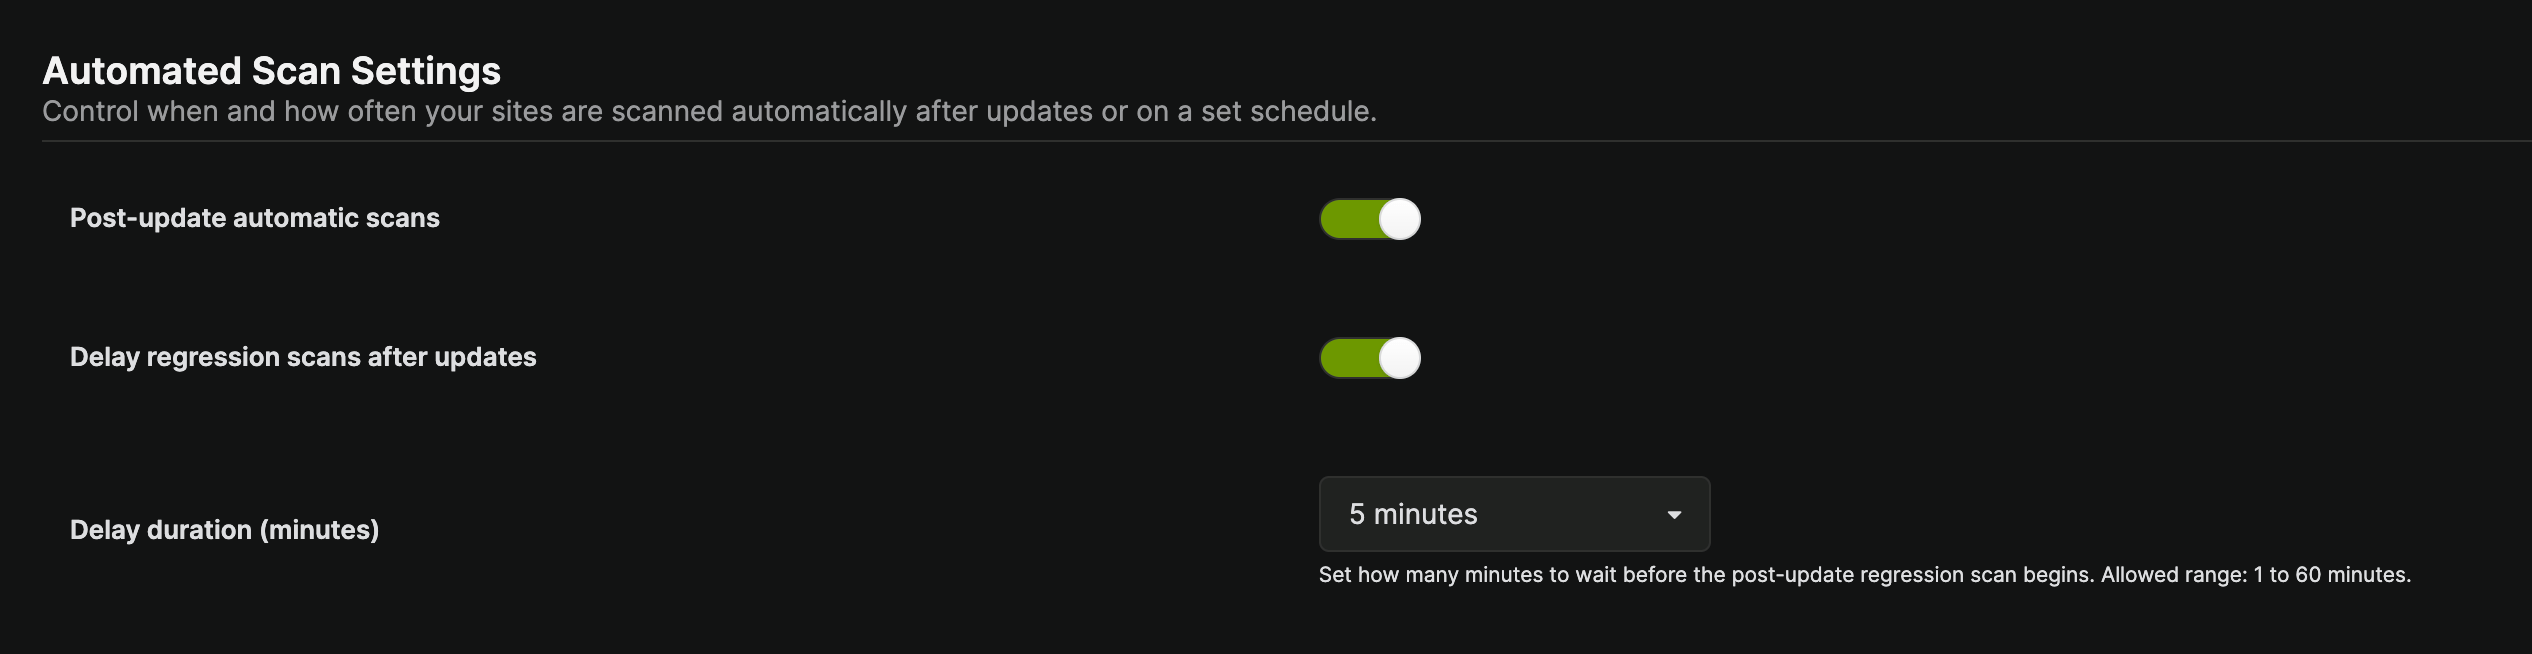
- Your sites use full-page caching, object caching, or a CDN that needs time to refresh after updates.
- Plugins or themes perform background tasks (e.g., asset rebuilding, cache warming) immediately after activation or update.
- You want a more stable baseline by scanning after the site has stabilized post-update.
Notifications Settings
• Enable notification emails – Get an email alert if a site’s changes exceed a specified threshold. • Change score threshold – Set the percentage difference that triggers a notification.If a child site has its own notification email recipients configured (see Per-site Settings), those recipients are used for that site’s alerts and override the general notification email settings. If no site-specific recipients are set, the general settings apply.
Per-site Settings
1
Go to the MainWP > Sites > Manage Sites page
2
Locate the desired child site and click on its name
3
Click Regression Testing in the sidebar on the left
4
Click the Settings tab
5
Enable Overwrite General Settings and click Save
6
Set your desired per-site preferences
7
Click the Save Settings button at the bottom of the page
Viewing Scan Results
1
Navigate to MainWP > Add-ons > Monitoring > Regression Testing
2
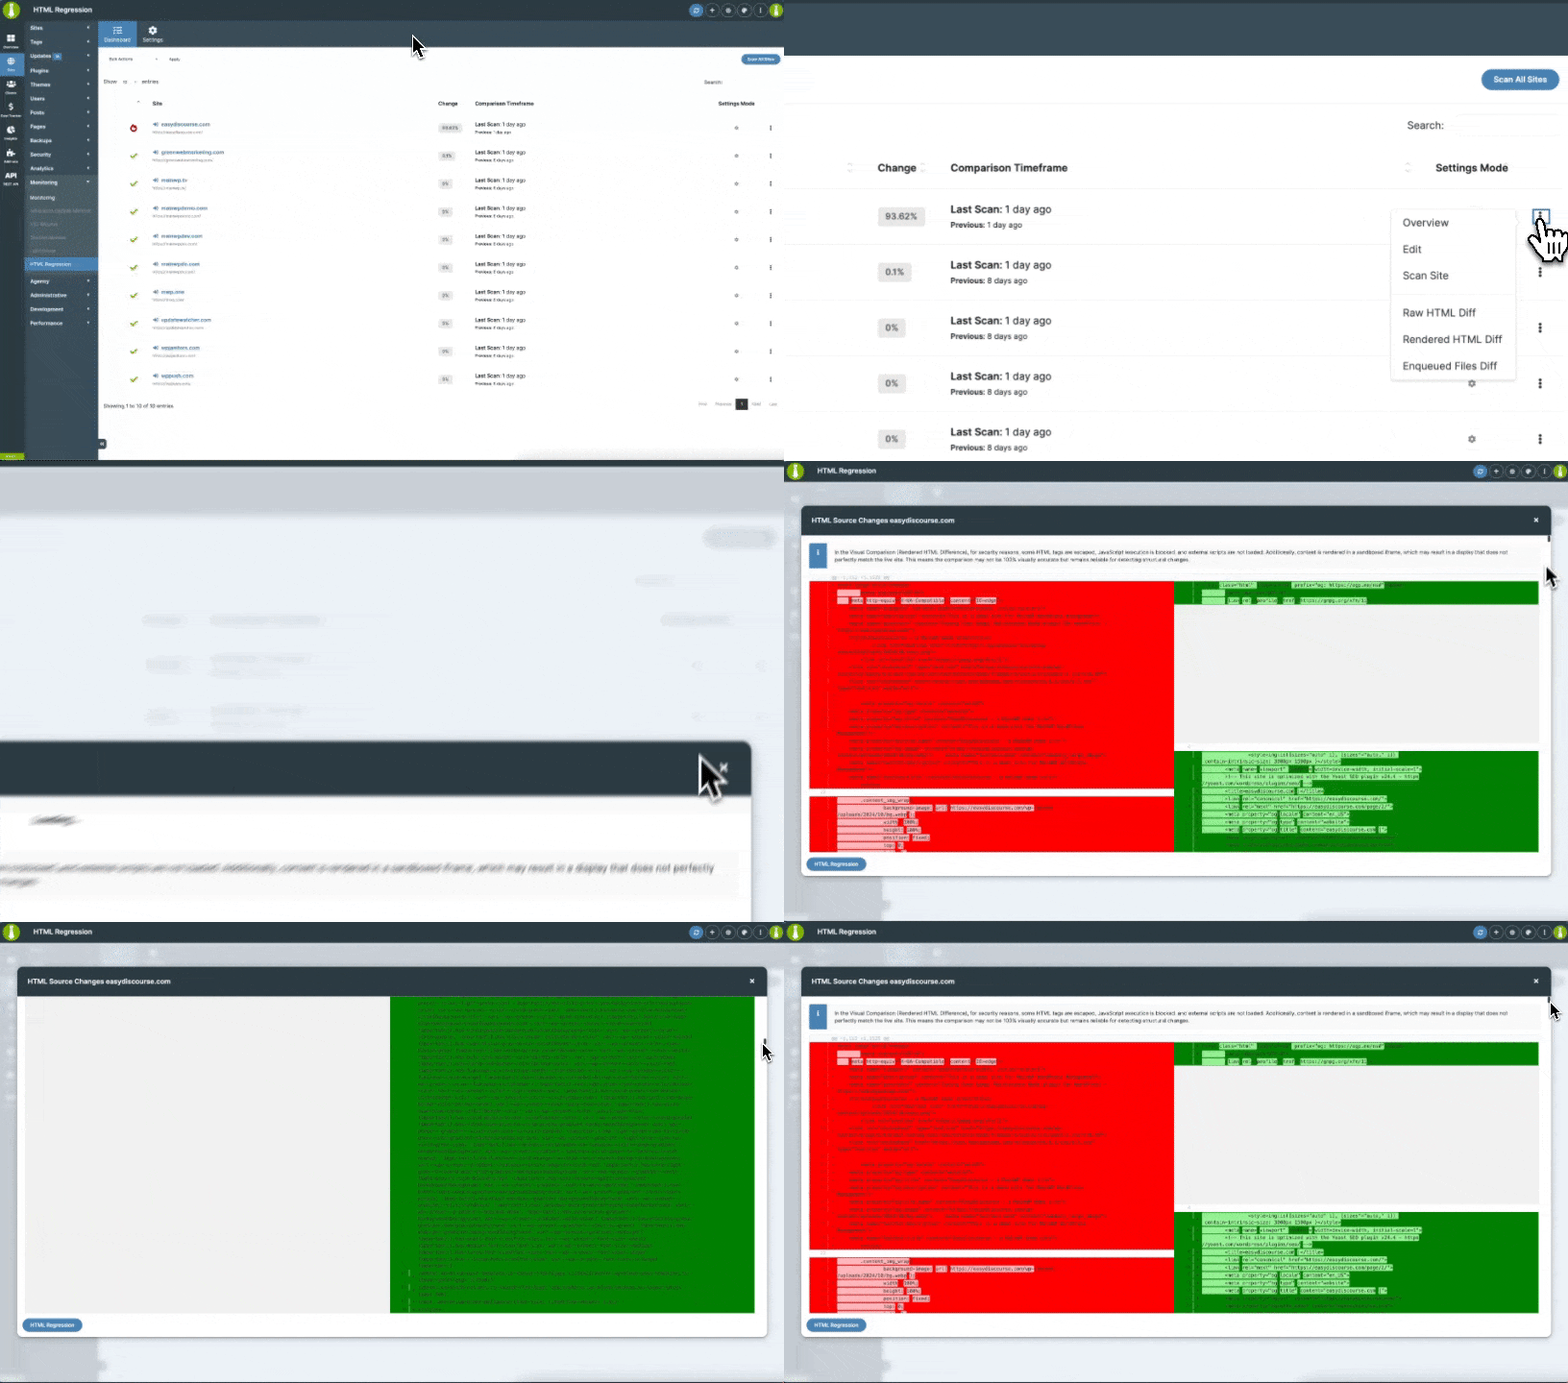
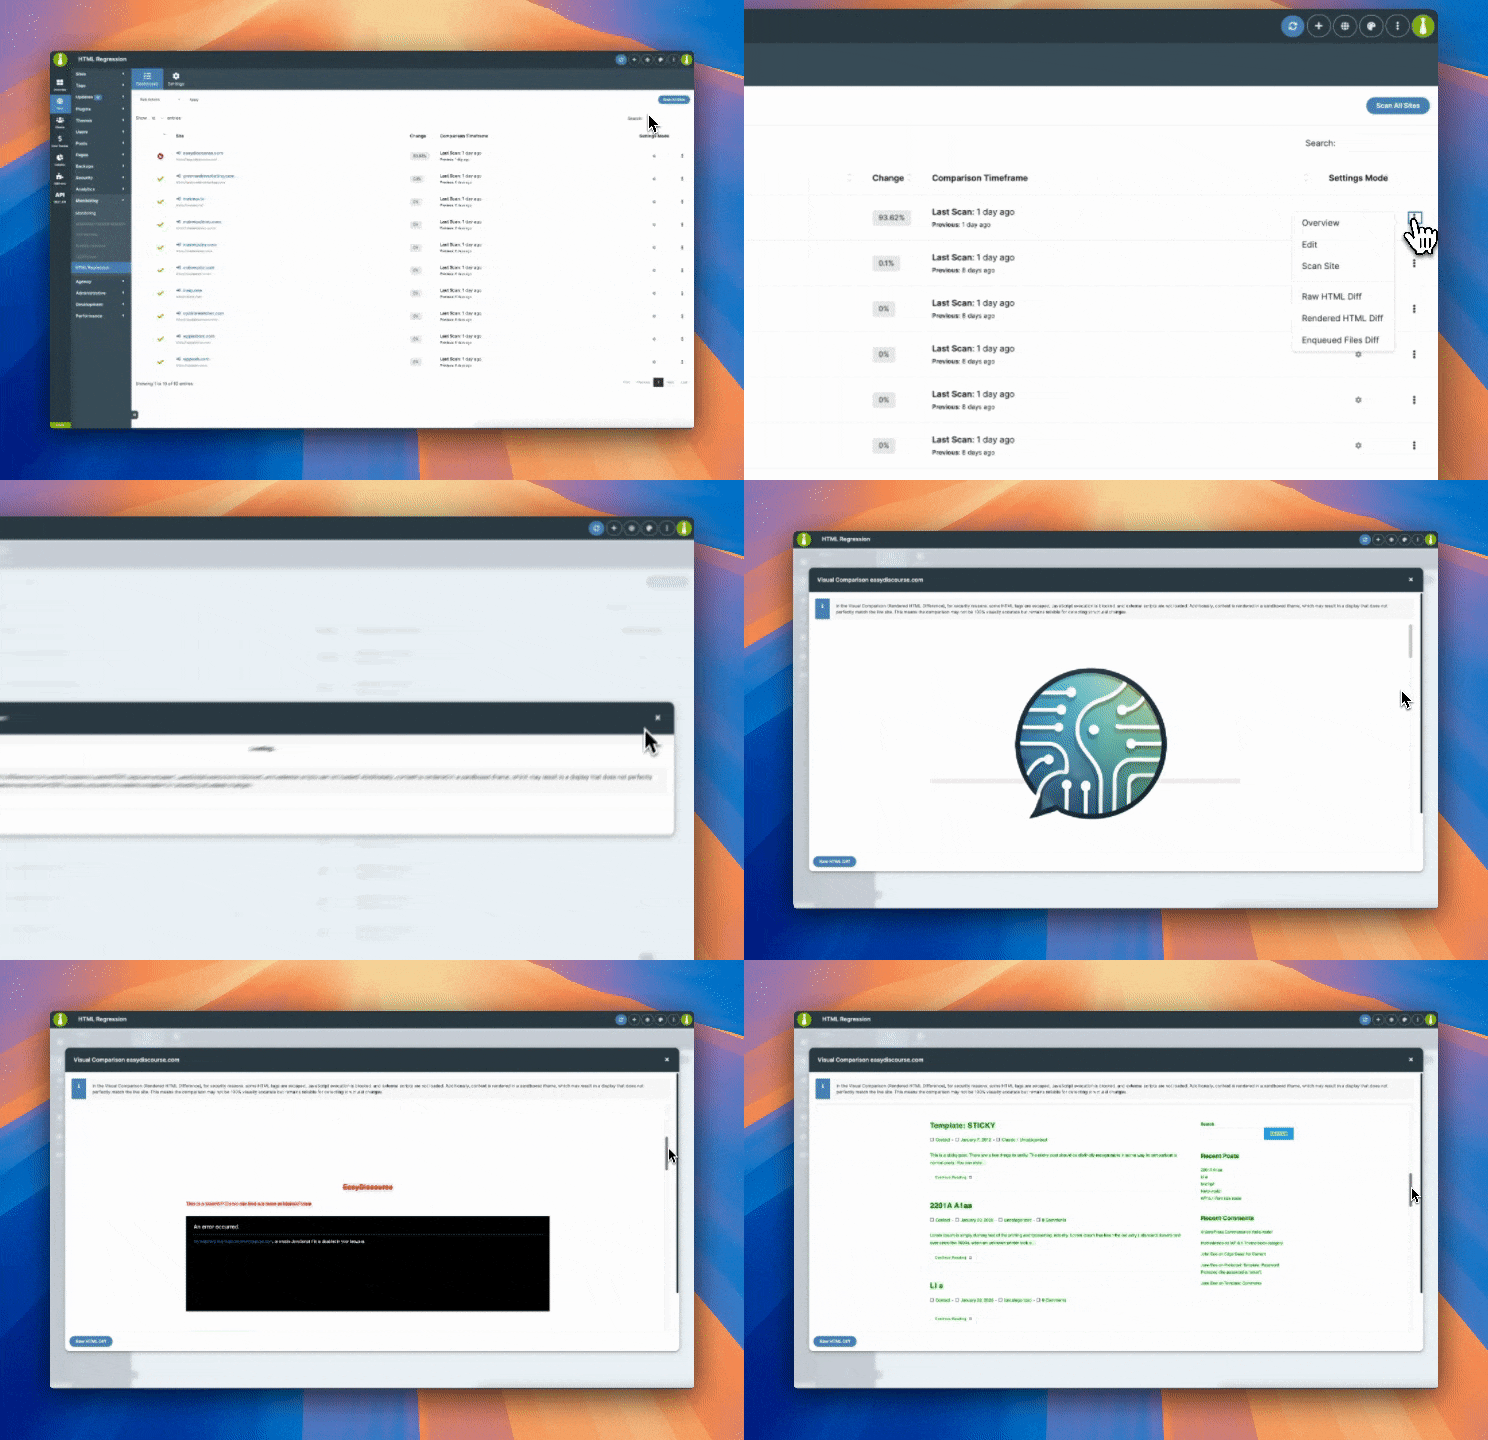
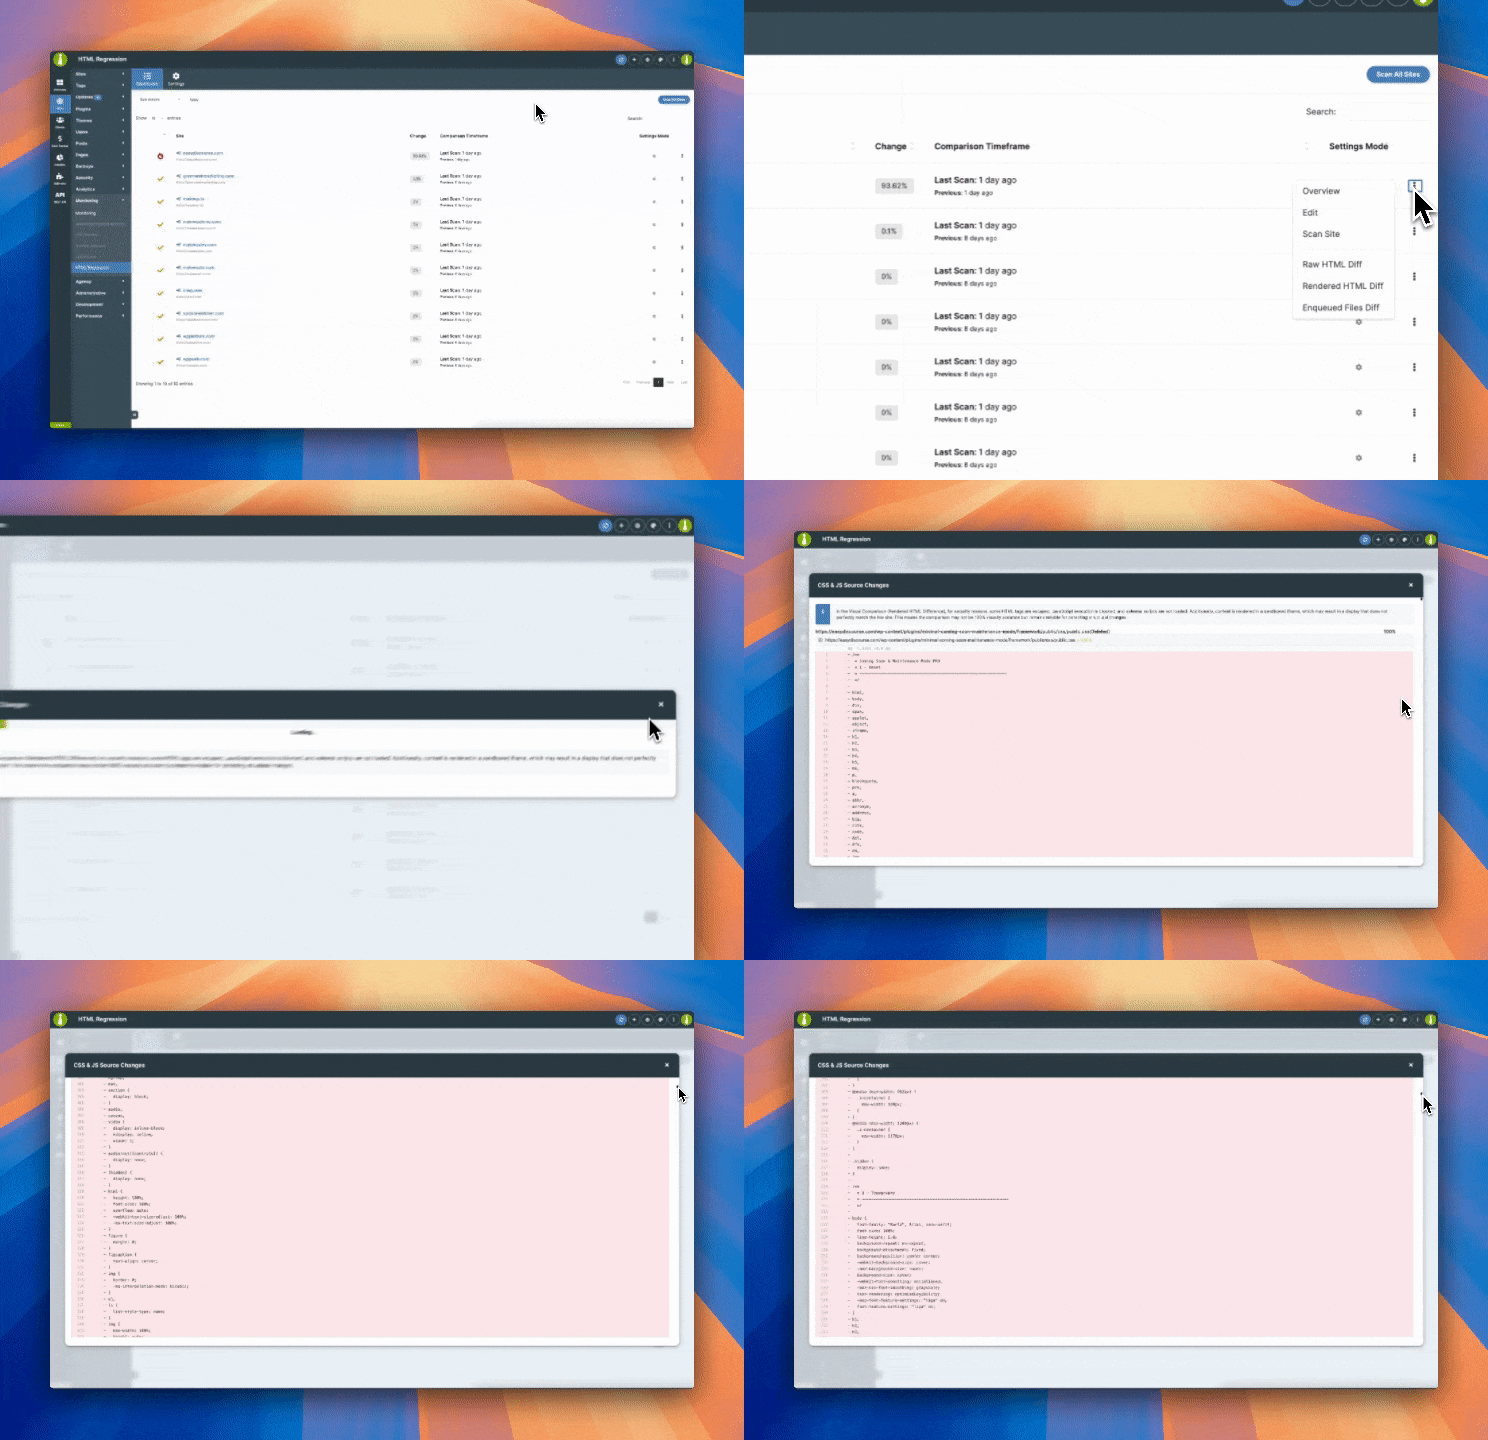
Locate the desired Child Site in the table, and then from the ellipsis menu choose:
Locate the desired Child Site in the table, and then from the ellipsis menu choose:
Widgets
MainWP Overview Page Widget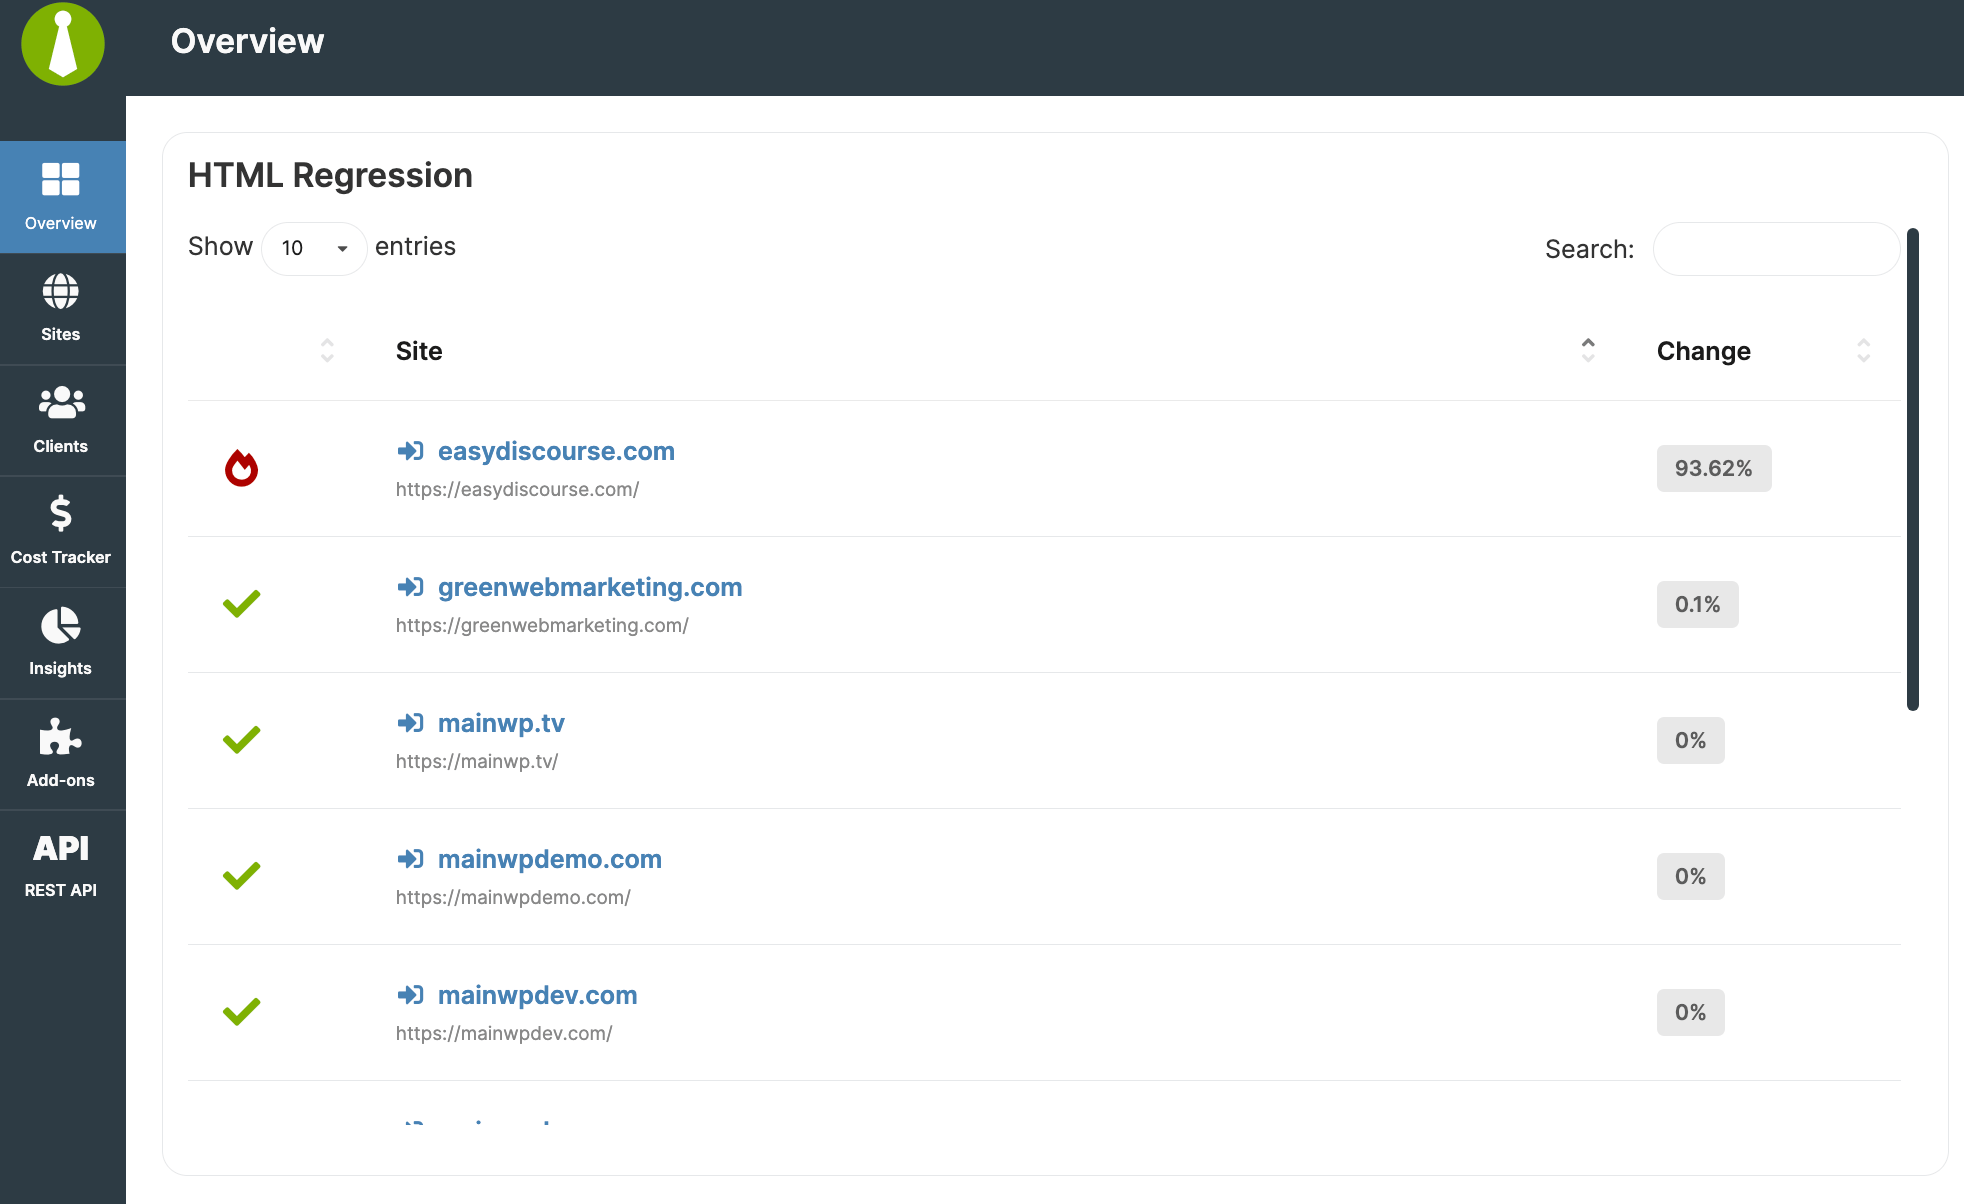
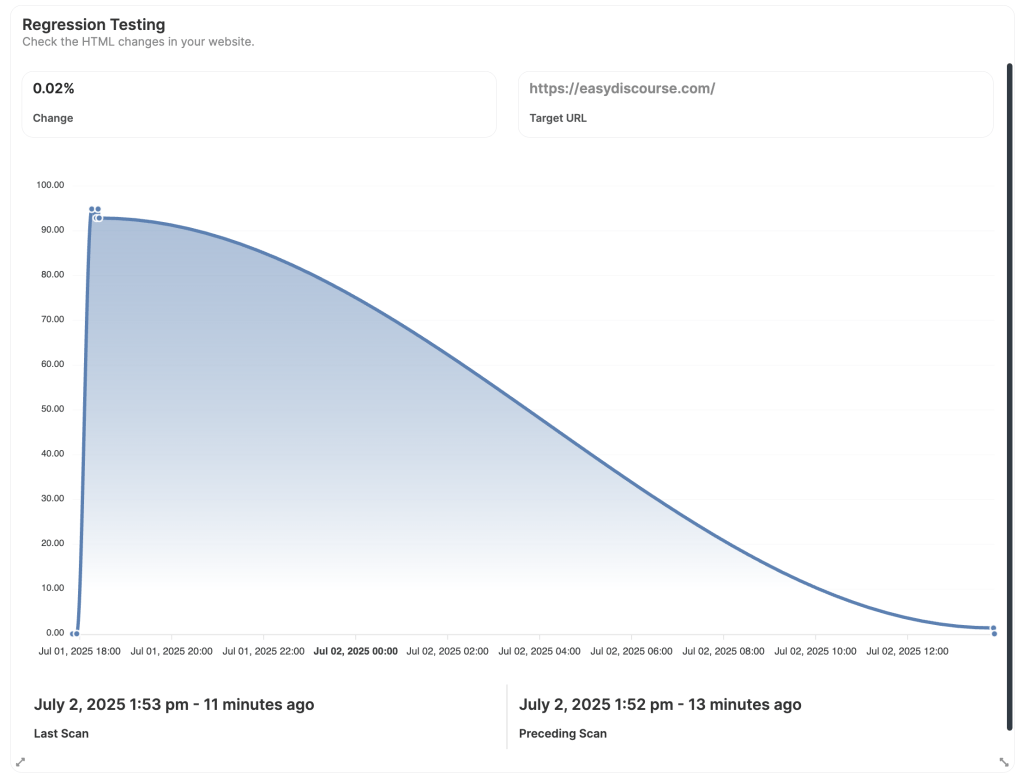
Scheduled Bulk Scanning Behavior
When Regression Testing is scheduled to run automatically (e.g., daily or weekly), the system does not attempt to scan all sites or all pages at once. Instead, it follows a phased approach: • At the scheduled start time, the system selects the first three websites to begin scanning.• Target pages on each site are scanned in batches of up to three pages, with a 5-second interval before the next page batch.
• After 5 minutes, it proceeds to the next batch of three websites, repeating the same behavior.
• This cycle continues until all selected websites have been processed. This method ensures the scanning load is spread out and doesn’t overwhelm your server or the connected sites.
Related Resources
- Monitoring Add-ons - Browse all monitoring tools
- Manage Updates - Update management guide
- Dashboard Insights - Analytics for your Dashboard