
What You’ll Accomplish
- Create and manage client records
- Import multiple clients with CSV
- Assign child sites to clients
- Customize the client table display
- Use the Client Card for client overview
- Create custom client fields for Pro Reports
Prerequisites
- MainWP Dashboard installed and activated
- Child sites connected to your Dashboard
- Pro Reports extension (optional, for client reporting)
Create a New Client
1
Navigate to Add Client
Go to Clients > Add Client.
2
Enter client information
Fill in the client name (required) and other desired fields.
3
Assign sites (optional)
In the sidebar on the right, select child sites to assign to this client.
4
Save
Click Add Client.
The Client Email field supports multiple email addresses separated by commas:
email1@example.com, email2@example.com. Pro Reports uses the [client.email] token for the Send email to field.Import Clients (CSV)
Import multiple clients in one run by uploading a CSV file.1
Open Import Clients
Go to Clients > Import Clients.
2
Download the sample file
Click Download Sample to get the required CSV structure.
3
Prepare your CSV file
Keep the same column order used in the sample file. For Select sites, separate multiple site URLs with semicolons (
;).4
Upload and start import
Upload your
.csv file, keep CSV file contains a header enabled when row 1 is a header, and click Import Clients.5
Review import results
Watch the row-by-row log in the import modal. Fix failed rows, then import again.
CSV Columns and Formats
Lines starting with
# are treated as comments and skipped during import.Related
- Create a New Client for one-by-one client entry
Update a Client
1
Navigate to Clients
Go to Clients > Clients.
2
Edit client
Find the client and click Edit from the actions menu.
3
Update and save
Make your changes and click Update Client.
Delete Clients
Delete a Single Client
Go to Clients > Clients, find the client, and click Delete from the actions menu.Bulk Delete Clients
1
Select clients
Go to Clients > Clients and check the boxes next to clients you want to delete.
2
Apply action
Select Delete from the Bulk Actions dropdown and click Apply.
Customize the Manage Clients Table
1
Open Page Settings
Go to Clients > Clients and click the Page Settings (cog icon) in the top right.
2
Configure display
Set the number of clients to display per page and select which columns to show.
3
Save
Click Save Settings.
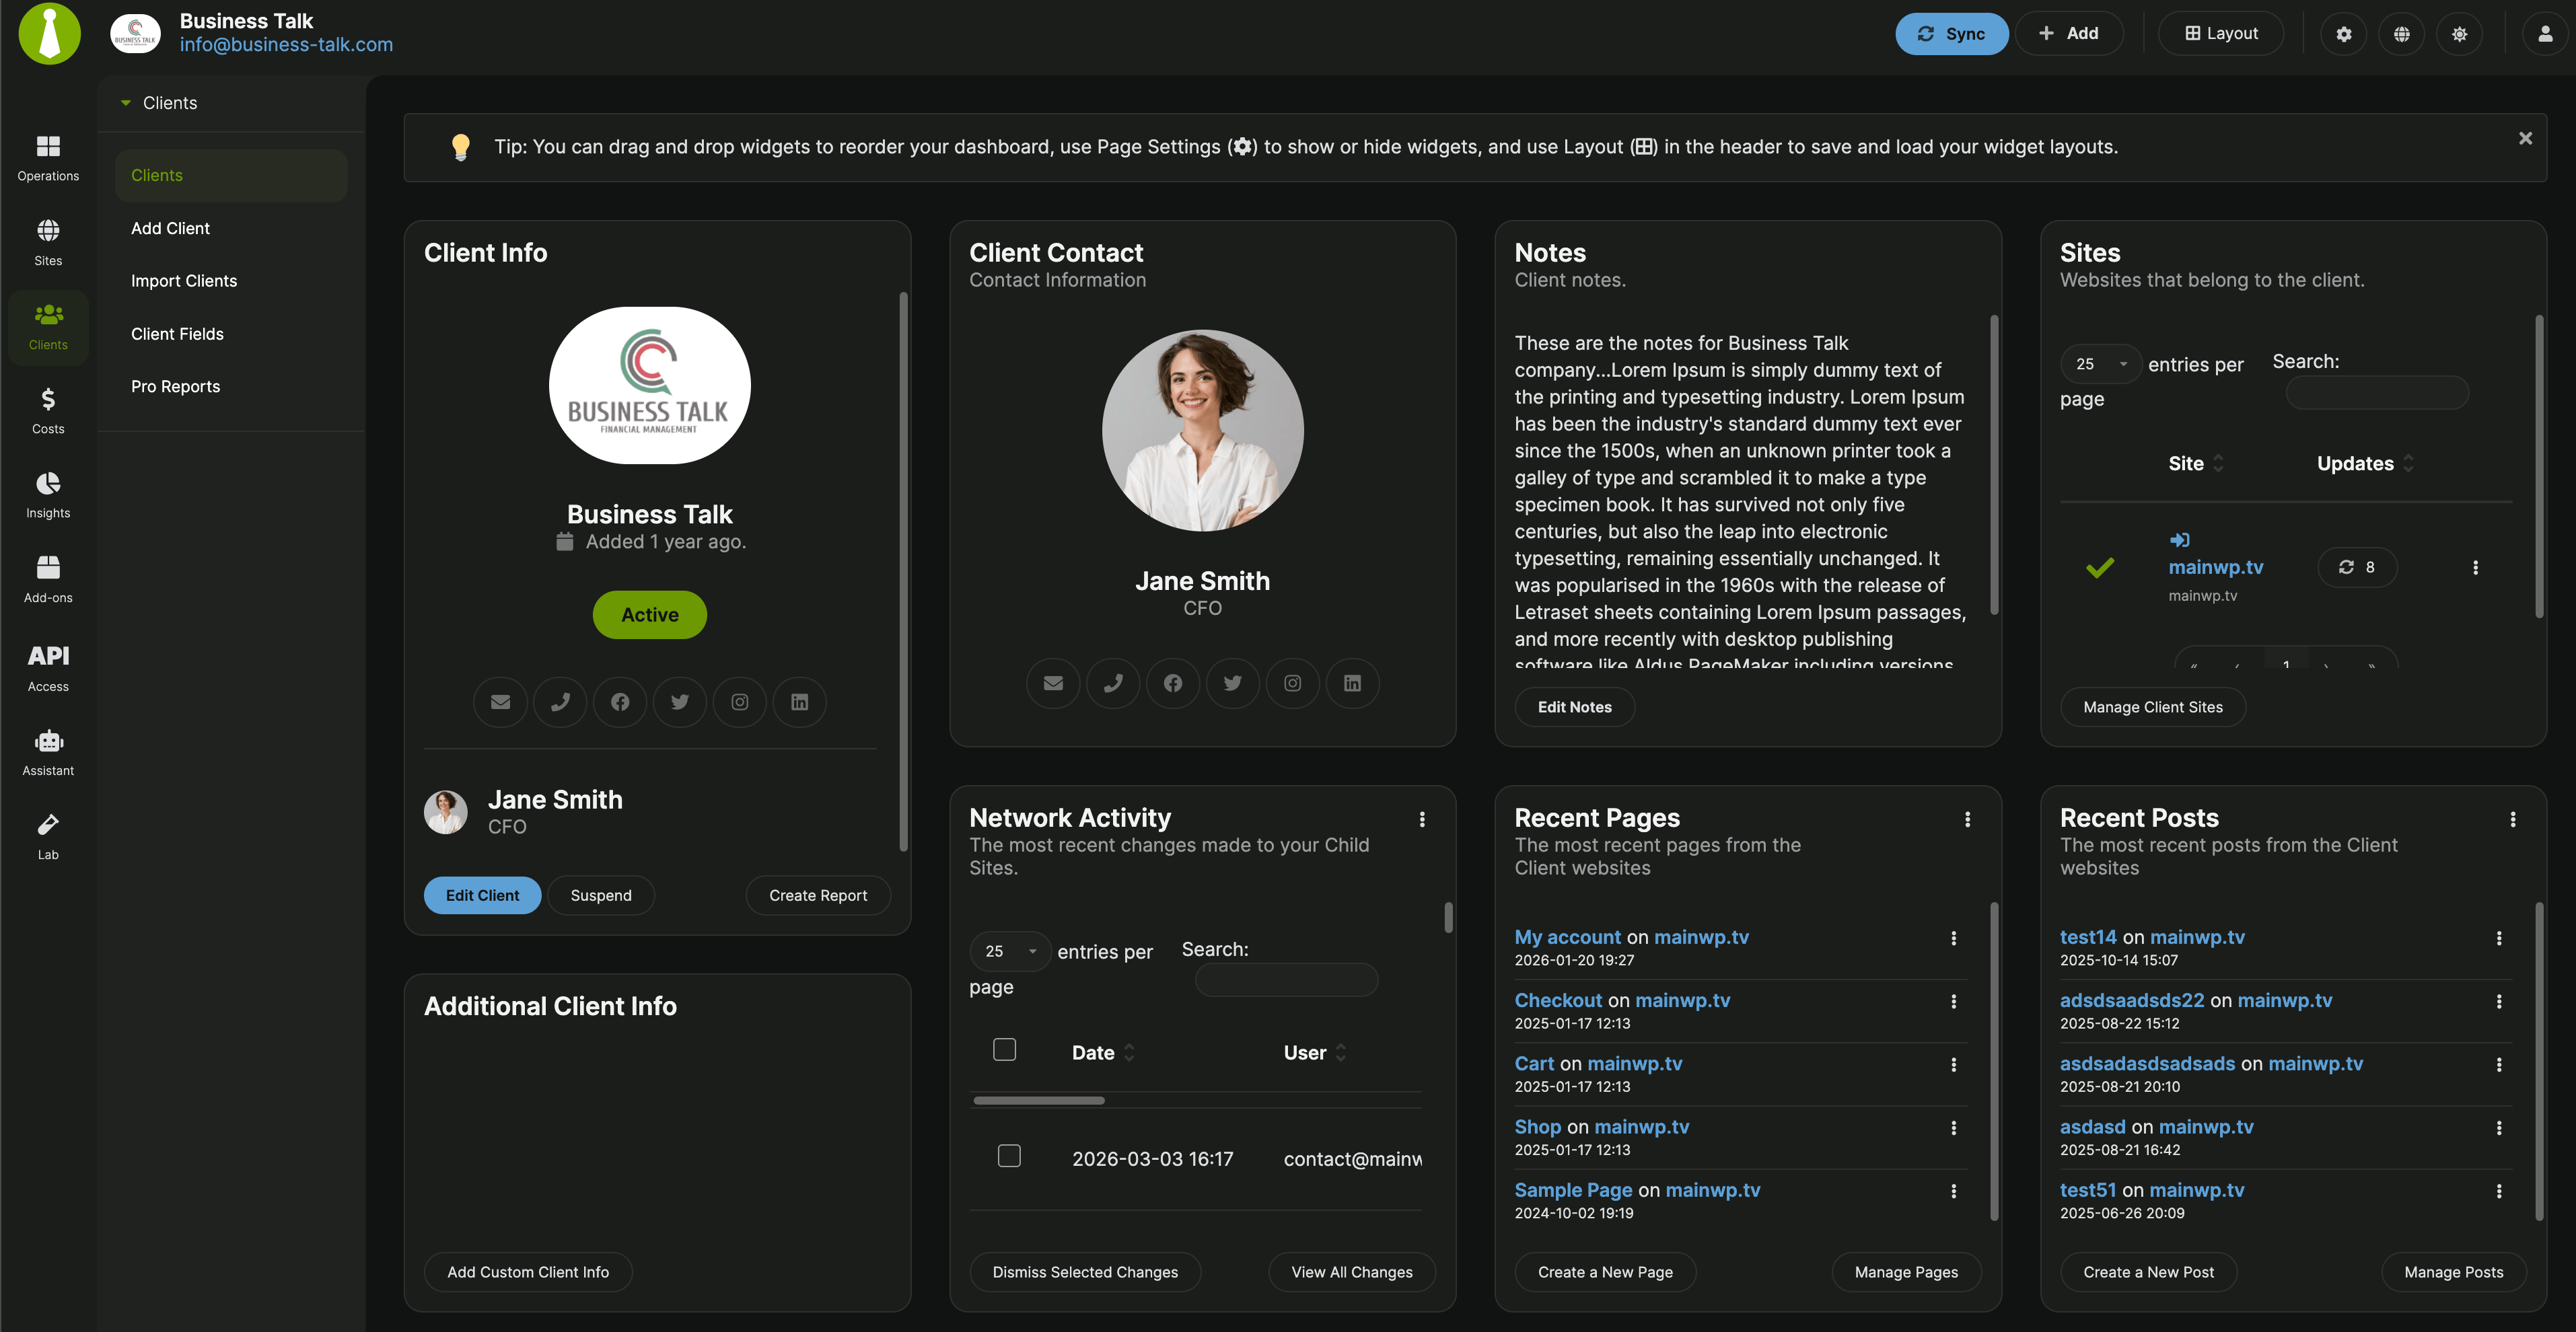
Client Card
The Client Card displays a consolidated overview of all information for a specific client. Widgets on this page can be resized and rearranged.Available Actions
The Client Info widget provides these actions:
The Sites widget provides Manage Client Sites, which opens the Sites page filtered to show only this client’s sites.
Client Overview Widgets
By default, the Client Card includes these widgets:- Client Info - Basic client details, status, and quick contact links
- Notes - Internal client notes with an Add Notes or Edit Notes action
- Sites - Child sites assigned to the client
- Additional Client Info - Saved custom fields and other extra client details
- Network Activity - Recent changes across the client’s child sites
- Recent Posts - Latest posts from the client’s child sites
- Recent Pages - Latest pages from the client’s child sites
Client Fields
Client Fields let you create custom data fields for storing additional client information. These fields generate tokens that can be used in Pro Reports.Add a New Field
1
Navigate to Client Fields
Go to Clients > Client Fields.
2
Create field
Click Add Client Field.
3
Configure field
Enter the Field Name (used as a token in Pro Reports) and Description.
4
Save
Click Save Field.
Edit a Field
1
Navigate to Client Fields
Go to Clients > Client Fields.
2
Edit
Find the field and click Edit from the actions menu.
3
Update and save
Make changes and click Save Field.
Delete a Field
Go to Clients > Client Fields, find the field, and click Delete from the actions menu.Use Custom Fields
After creating a field, set its value for each client on their Edit page. The field token can then be used in Pro Reports to display that data.Self-Check Checklist
- Client records are created with required information
- Child sites are assigned to appropriate clients
- CSV imports create clients and assign sites correctly
- Client Card displays correct site data
- Custom fields are created and populated (if needed)
- Table customization settings are saved
Related Resources
- Pro Reports Extension - Generate client reports
- Available Pro Reports Tokens - Token reference for reports