
What You’ll Accomplish
- Search and view pages across all child sites
- Create new pages on one or multiple sites
- Schedule pages for future publication
- Edit existing pages
- Delete and restore pages
Prerequisites
- MainWP Dashboard installed and activated
- At least one child site connected to your Dashboard
- Administrator access to your Dashboard site
MainWP supports default WordPress post types. For custom post types, use the MainWP Custom Post Types Extension.
View Existing Pages
1
Navigate to Manage Pages
Go to MainWP > Sites > Content Operations > Manage Pages.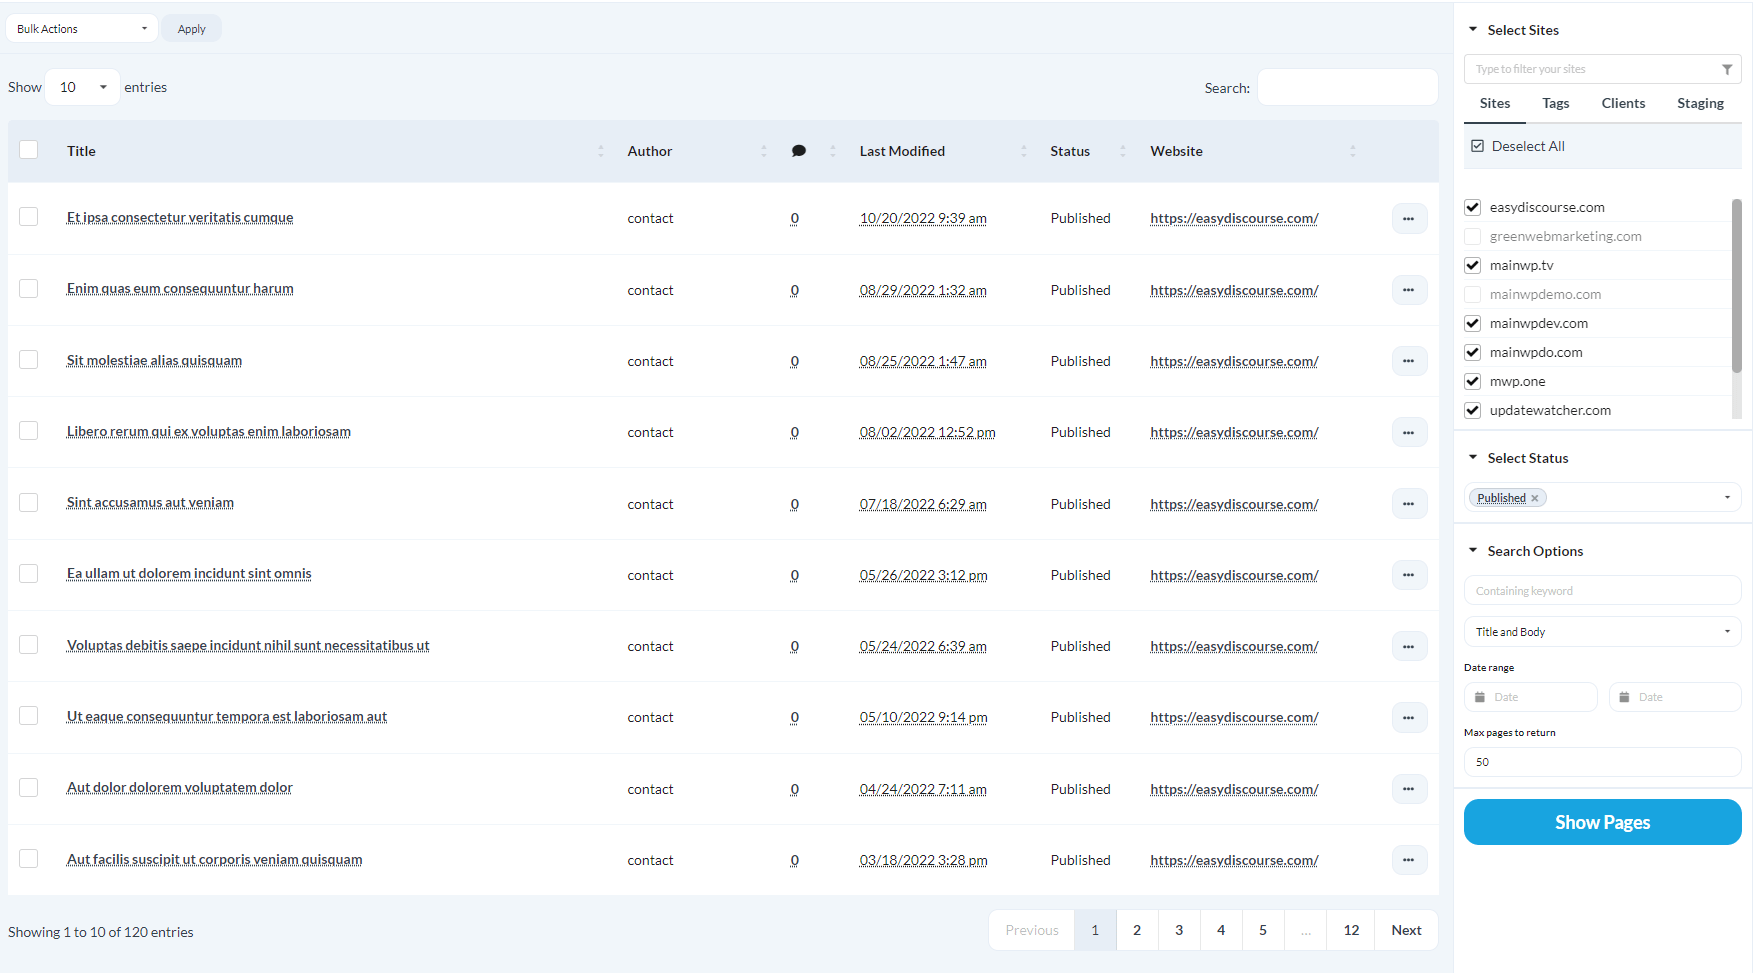
2
Set search filters
In the Search section:
3
Select sites
Select the child sites you want to search.
4
Search
Click Show Pages.A list of matching pages appears at the bottom of the page.
By default, MainWP returns up to 50 pages per child site. You can change this limit using Max pages to return under Search Options.
Create a New Page
1
Navigate to Add New
Go to MainWP > Sites > Content Operations > Manage Pages, then click Create New Page.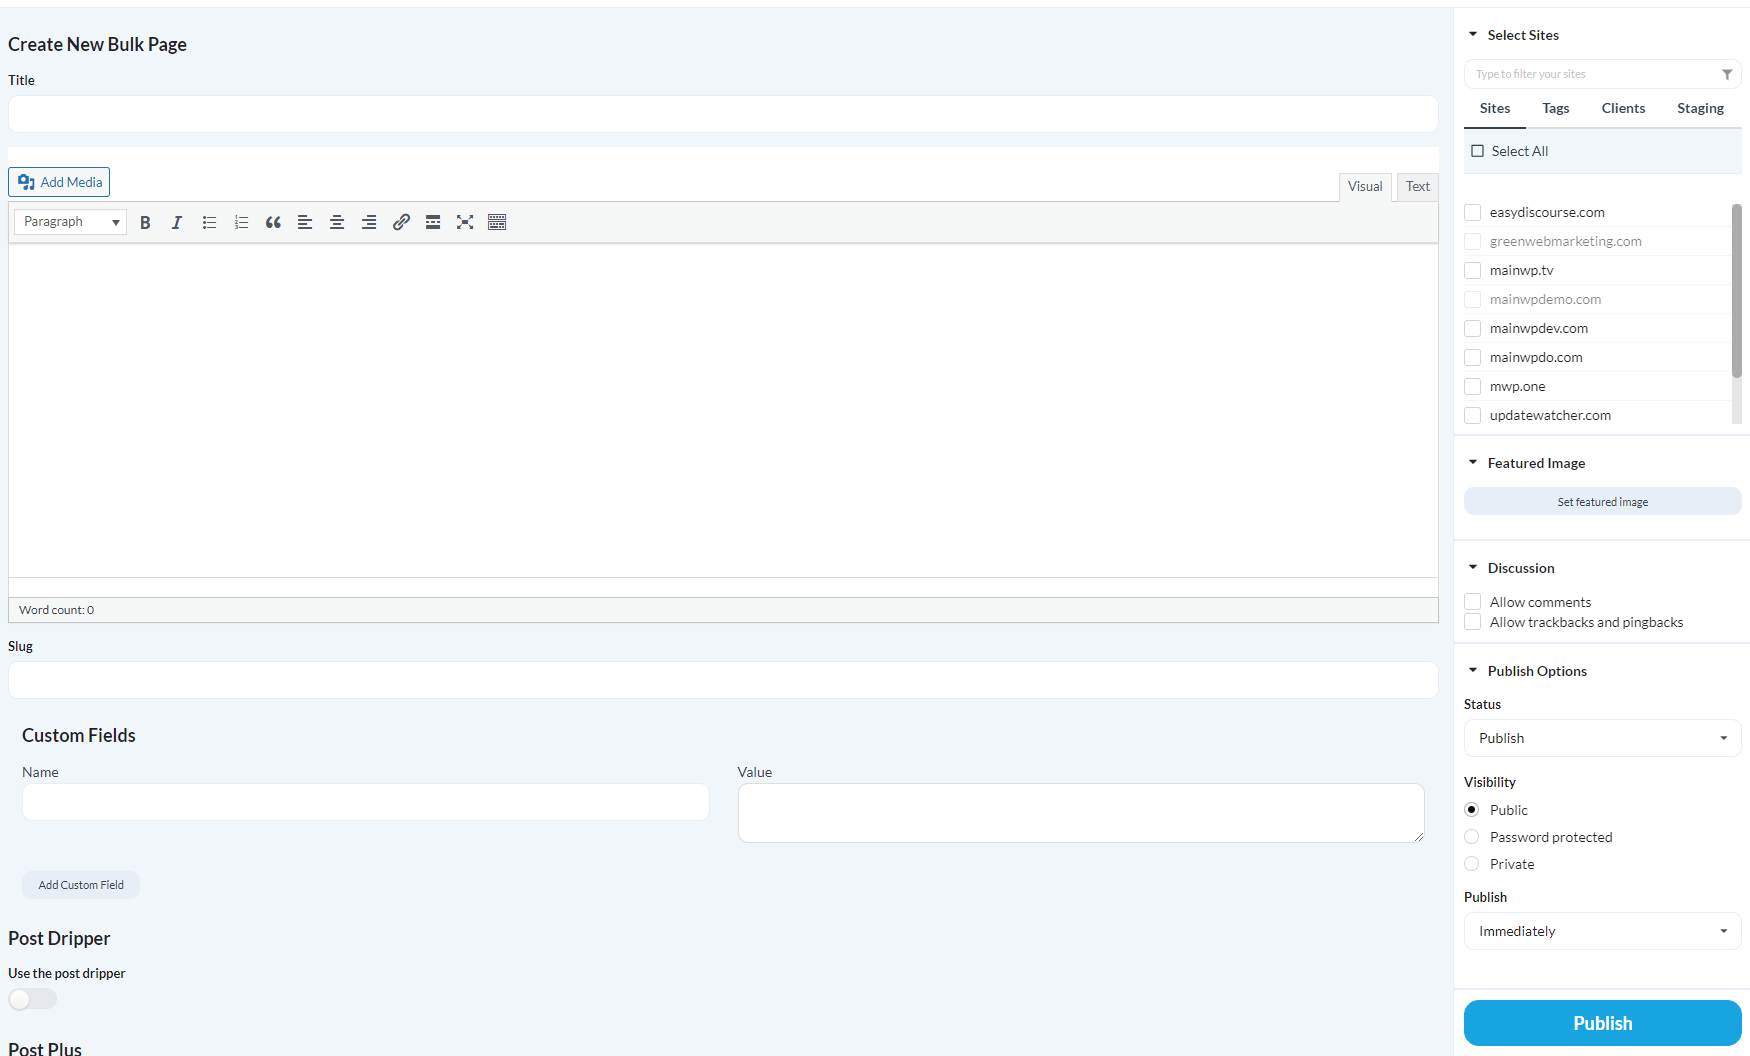
2
Enter page content
Complete the page fields:
3
Select sites
Select the child sites where you want to publish this page.
4
Publish
Click Publish.The page is created on all selected sites.
Schedule a Page
1
Create page
Follow the steps above to create a new page (steps 1-3).
2
Set schedule
In the Publish Options section:
- Under Publish, select Schedule
- Set the date and time
3
Schedule
Click Publish.The page is scheduled on all selected sites.
Page preview is not available in the MainWP Dashboard because pages may display differently on each child site due to different themes and settings.
Edit an Existing Page
1
Search for page
Go to MainWP > Sites > Content Operations > Manage Pages and search for the page.
2
Edit
Find the page in the results and click Edit.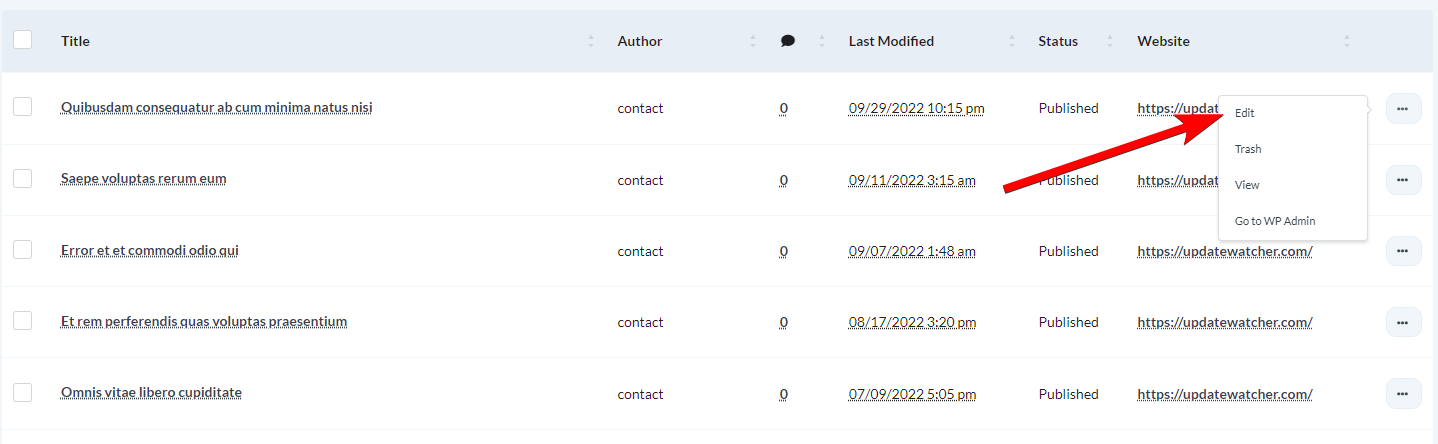
3
Update
Make your changes, then click Publish.
View a Page on Its Site
1
Search for page
Go to MainWP > Sites > Content Operations > Manage Pages and search for the page.
2
View
Find the page in the results and click View.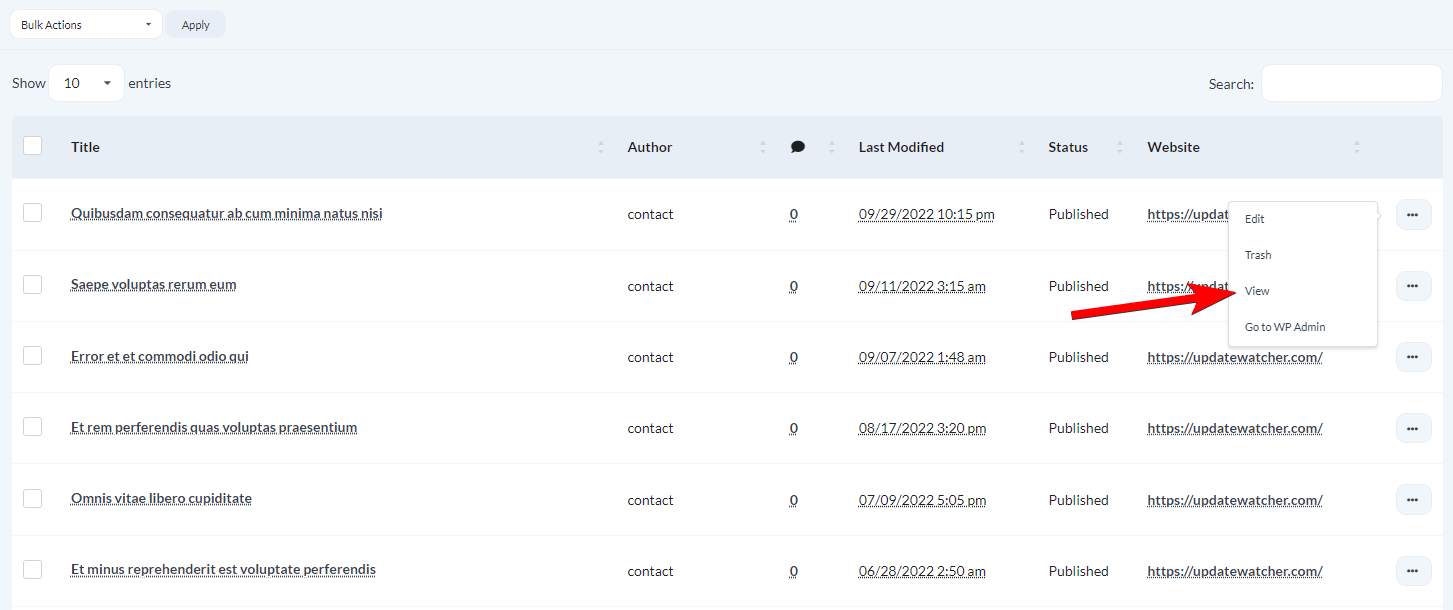
Delete Pages
Move to Trash
1
Search for page
Go to MainWP > Sites > Content Operations > Manage Pages and search for the page.
2
Trash
Find the page and click Trash.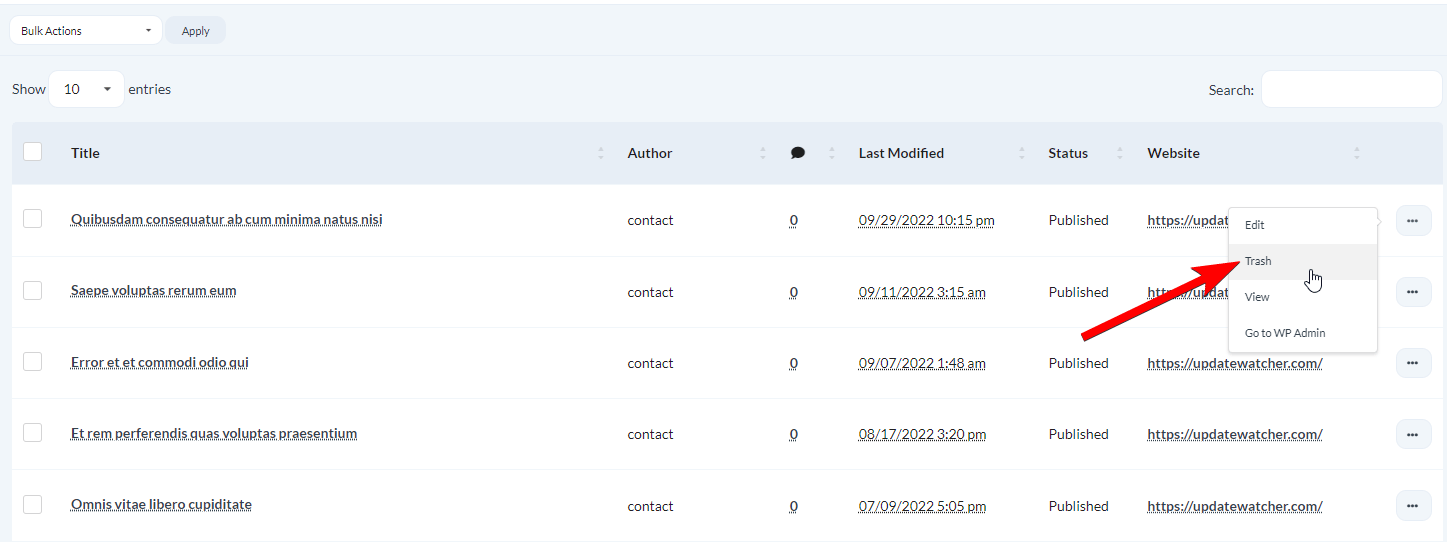
Delete Permanently
The per-page Delete permanently action appears only for pages in Trash.1
Search for trashed pages
Go to MainWP > Sites > Content Operations > Manage Pages and set Status to Trash.
2
Delete
Find the page and click Delete Permanently.
Restore a Page
1
Search for trashed pages
Go to MainWP > Sites > Content Operations > Manage Pages and set Status to Trash.
2
Restore
Find the page and click Restore.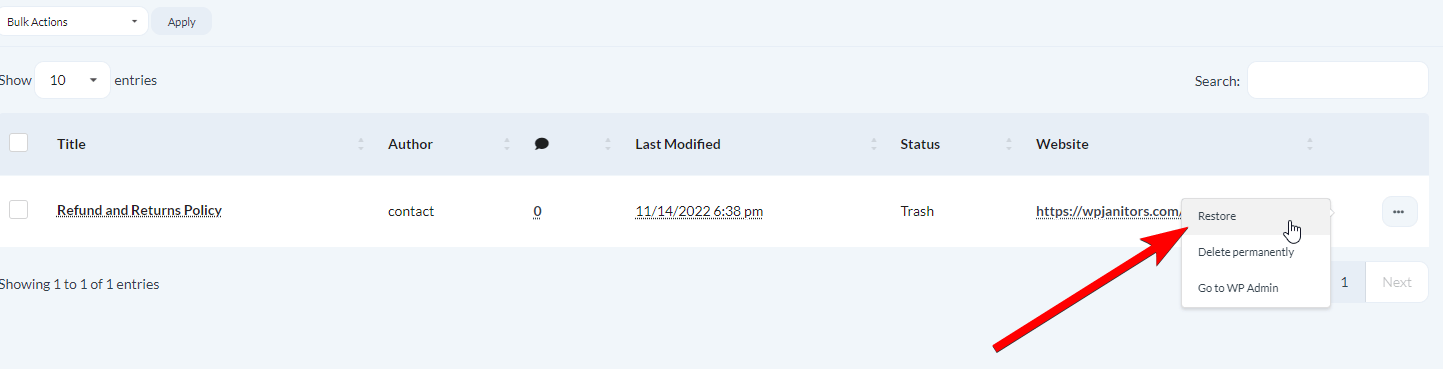
Self-Check Checklist
- You can search and view pages across child sites
- New pages publish successfully to selected sites
- Scheduled pages show correct scheduling
- Page edits save correctly
- Deleted pages move to trash
- Trashed pages restore successfully
Related Resources
- Manage Posts - Post management documentation
- Custom Post Types Extension - Manage custom post types
- Boilerplate Extension - Create content templates